
Brief overview of SketchUp Drawing & Design Tools
Rajib Dey : Editor-in-chief
SketchUp is a user-friendly 3D modeling program with which one can draw different kinds of shapes and turn them into 3D. SketchUp contains some intuitive & easy-to-learn drawing and other tools and these can be utilized to generate 3d models of anything like houses, sheds, decks, home additions, woodworking projects as well as space ships. Every SketchUp users should have expertise in applying these drawing tools in order to make their work process simpler.
Introduction of the drawing tools
SketchUp Rectangle Tool: Rectangle tool can be accessible through the Rectangle menu and it is utilized to sketch four coplanar intersecting edges and a subsequent Face entity. The SketchUp users can illustrate a rectangle and then put the measurements according to their choice to find out the area of the rectangle. Here the height will be excluded.
While staring a drawing, a rectangle's dimensions vigorously become visible in the Measurements Toolbar. Type proper length and width dimensions in the Measurements Toolbar and press enter either. Value should be put in the measurements toolbar after clicking the first corner or drawing the rectangle instantly.
The SketchUp can only recognize numeric value and apply it in the existing document units setting. The SketchUp users can also have the option to give either Imperial (such as 1'6") or Metric (such as 3.652m) units at any time, apart from the document units setting.
The SketchUp users can put one dimension one time in the Measurements Toolbar. If any user put a value and a comma (3',) simultaneously, the new value is applicable to the first dimension, and the second dimension will be preserve from before. In the same way, if any user put a comma and then a value (,3'), it will only affect the second dimension.
Keyboard Shortcut to draw circles applying Circle tool: R
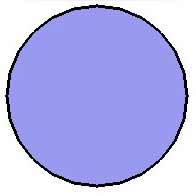
SketchUp Circle Tool: Circle tool is used to sketch circle entities. The user can visit Toolbar/Tool Palette and turn on the Circle tool. The user can also activate it from the Draw menu.
Keyboard Shortcut to draw circles applying Circle tool: C
Circle entities: Circle entities are an amalgamation of several line segments adjoining collectively to make a circle. These entities perform like a distinct line in order to identify the edge of a face as well as segregate a face. If anyone prefers to select the entire circle entity, he/she has to select just one section of the arc.
Here all inference procedures will maneuver on the Circle devoid of it contains segments. For example, every point on the circle is inferred as an endpoint of the segment.
The users can utilize the ‘explode curve context menu’ to split a circle into regular edges segments.
Circle entities are formed with a radius and number of segments. Arc and Circle entities are special because they mechanically generate softened edges while extruding it with the Push/Pull tool.
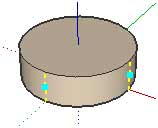
How to edit an extruded circle: In order to extrude a 2D circle, with the Push/Pull Tool, a special cylindrical Surface entity is formed at that time. Apply the following steps for altering the size of the extruded circle:
- Opt for the Move tool (
 ). The cursor will transform to a four-way arrow.
 - Select one of the four cardinal points (denoted by a vertical dashed line) on the side of the extruded circle.
- Shift the cursor inner to reduce the size of the extruded circle or outer to enlarge the size of the extruded circle.
Circle segmentation: If a Circle contains additional line segments, it can generate smoother curvature in comparison with a circle having fewer line segments. However, more line segments in a circle results in raising the size of the concerned model and demeans performance. For getting superior results, just point out little segmentation and apply smoothing and edge softening to form the feeling of smoothness.
Push/pull tool
With push/pull tool the SketchUp users can quickly & easily render any 2D shape into a 3D object as well as extrude any flat surface into a 3D form.
The users can visit the toolbar menu and click on the icon to select it. Alternatively, the user can go to Tool menu bar and select it. This tool is very useful to pull or push face entities related to a model for raising or reducing its volume while drawing a 3D model. Besides, the users can also generate additional geometry with push/pull tool.
One can Push/Pull a rectangle into a box. Sketch the outline of a staircase and Push/Pull it into 3D. Push/Pull a hole through your wall to create a window easily.
As for instance, Select push/pull tool and start to pull a rectangle up. Put in 3’ or 36” in the measurement box. If inches are selected as a default value, just put 36. Now press enter. It will form a rectangle containing the dimensions of 6x4x3.
Keyboard shortcut : P
Polygon Tool: Introduction - With the Polygon tool, the SketchUp users will be able to sketch regular Polygon entities inscribed within a circle, containing 3 to 100 sides. Turn on the Polygon tool from the Toolbar / Tool Palette or from the Draw menu. After drawing a polygon, type the number of sides that should be contained in it. In order to perform that while commence the drawing, type in the number you want to put and save.
The Polygon menu item invokes a Polygon tool used to draw regular Polygon entities.
Line Tool: Introduction
The line tool is applied to sketch the edges or Line entities. The SketchUp users can unite the line entities to create a face. The Line tool can also be used to divide faces or heal deleted faces. Activate the Line tool from the Toolbar / Tool Palette or from the Draw menu. After selecting the line tool, put the required length as per your choice. As for example, if you put 16’ it will create a line containing length 16 feet.
While generating a shape by affixing a line, always keep in mind that they all belong to the same plane. At the time of closing a surface if it doesn't fill automatically, it indicates that your surface exists on numerous planes.
Keyboard Shortcut: L
Arc Tool: Introduction
The Arc tool is utilized to sketch Arc entities. Arcs contain various connected line segments which are editable as a single arc. The SketchUp users can turn on the Arc tool by going through the Toolbar / Tool Palette or from the Draw menu.
Keyboard Shortcut: A
Arc entities
Arc entities are formed with the grouping of various line segments adjoined jointly to approximate the curving of the arc. These entities perform as a single line focusing on characterizing the edge of a face as well as partitioning a face. In order to select the complete Arc entity, just select one segment of the concerned Arc. All inference techniques will function on the Arc instead of it consists of segments. As for instance, every point on the arc is inferred as an endpoint of the segment. With the help of Explode Curve context menu item, one can split an arc into regular edge segments.
Arc entities consist of a length (also known as the base chord), bulge, radius, and number of segments. Arc and Circle entities can automatically create softened edges after being extruded with the Push/Pull tool.
Arc segmentation: If an Arc includes additional line segments, it can produce smoother curvature in comparison with a circle containing fewer line segments. However, more line segments in a circle can enhance the size of the concerned model and demeans performance. In order to get better results, just indicate little segmentation and apply smoothing and edge softening to make the feeling of smoothness.
Freehand Tool: Introduction
Freehand tools are considered as the best way to sketch asymmetrical hand-drawn & coplanar connected lines with respect to Curve entities and 3D Polyline entities. Curve entities include several line segments which are associated together. These curves perform as a single line useful for identifying and segregating faces. Curve entities provide huge benefits to symbolize contours in a contour map or other organic shapes. For using the Free hand tool turn it on from the Toolbar / Tool Palette or from the Draw menu.
Drawing 3D polylines: 3D polylines are not liable to produce inference snaps or influence geometry in any way. One can apply 3D polylines to outline imported drawings, 2D sketching, or garnish any model. Prior to start the drawing for making 3D polyline, just press and hold the Shift key.
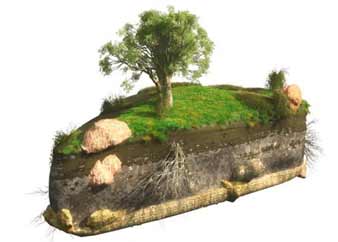
Sculpting Tools for SketchUp: SketchUp is a great tool for poly modeling. But at the time of creating models for compound curved surfaces and terrain modeling, the SketchUp users find it very complicated to perform the task with SketchUp.
There are two different plugins which can be very useful for modeling terrain construction as well as organic and vehicle construction.
Artisan
Dale Martens has created this tool which consists of a set of intuitive sculpting tools useful for making organic shapes. Within the toolset, there exists a poly-reducer useful for importing models from a NERB software package similar to Rhino or Maya. The tool facilitates SketchUp users to choose how much they require minimizing the poly count of a model to resize it according to their choice. The users will get ability to turn around the process and get a low-poly model and enhance the detail.
Vertex Tools

The another good plugin is known as Vertex Tools. The Norway base model maker, Thom Thomassen has developed these tools. The cost of the plugin is $20.
The plugin is also very useful for making terrain as selection tools within the plugin facilitate you to put how the tools have an effect on the adjacent polys with either a linear or cosine fall-off.
Vertex Tool version 1.1
Introduction of the Design Tools
DrawMetal Tools: DrawMetal contains plugins (extensions) for SketchUp® and it is very useful for illustrating various types of shapes in the form of spirals, curves and tapered (tapered extrusions). In architectural and ornamental scrollwork, Curved tapered shapes are playing a vital role and here they are applied to work out the amount of stock (raw material) necessary to fabricate the tapers.
The plugins are free of cost.
Curve Maker: Curve Maker is applied to sketch various types of spirals and curves co-actively, from the given dimensions or by identifying values for mathematical parameters.
Taper Maker: Taper Maker is applied to sketch a taper (a tapered extrusion) alongside a path (line) as set by the user. Taper cross-sections may come in various shapes like round, square, rectangular, hexagonal or octagonal.
Taper Maker can also sketch tapered right trapezoid and quadrilateral cross sections connecting a pair of paths.
Stock Maker: With Stock Maker, one can calculate approximately the necessity of stock to fabricate a taper. Stock Maker also gathers requisites across various tapers and guess the total finished weight and stock cost.
Draw menu (Windows): SketchUp drawing tools can also be accessible through the Draw menu. It provides an alternative method to utilize the toolbars or keyboard shortcuts.
Before starting your modeling work with SketchUp, go through the following video tutorial which provides you step-by-step learning process for using the essential tools.


- Sponsored Plugins

- Cover Story
-
 SketchUp Can Help You Win Interior..
 -
Best Laptops for SketchUp
-
How to Resize Textures and Materials..
-
Discovering SketchUp 2020
-
Line Rendering with SketchUp and VRay
-
Pushing The Boundary with architectural
-
Trimble Visiting Professionals Program
-
Diagonal Tile Planning in SketchUp
-
Highlights of some amazing 3D Printed
-
Review of a new SketchUp Guide
- Sketchup Resources
-
SKP for iphone/ipad
-
SKP for terrain modeling
-
Pool Water In Vray Sketchup
-
Rendering Optimization In Vray Sketchup
-
Background Modification In sketchup
-
Grass Making with sketchup fur plugin
-
Landscape designing in Sketchup
-
Apply styles with sketchup
-
Bedroom Making with sketchup
-
Review of Rendering Software
-
Enhancing rendering for 3d modeling
-
The combination of sketchup
-
Exterior Night Scene rendering with vray