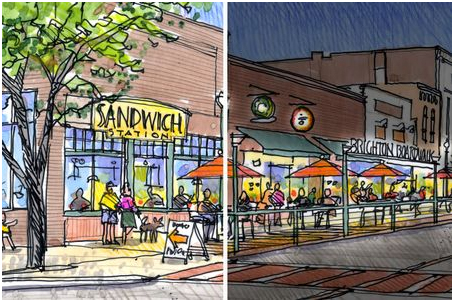
This is a simple method of taking a hand drawing and turning it into a night scene using Photoshop and a couple of very quick digital modifications. I’ve always struggled to simulate a night time scene with traditional hand drawings. I found it nearly impossible to render the evening illumination from storefronts and the dramatic contrast between dark shadows and lighted spaces....until now!
A quick and effective way of creating the wonderful quality of evening light is to layer over your hand drawing with a transparent black overlay in Photoshop, then erase portions of it where the light occurs. I created this sketch for a recent studioINSITE project and turned my original hand drawing of a daytime scene into the night scene for the title slide in a PowerPoint presentation. My step-by-step process is explained below:
Initial Overlay and Trace Drawing
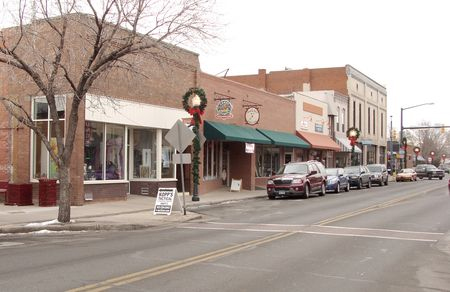
Step 1: Digital Photograph. I composed this photo specifically to generate a hand drawing showing what a temporary widening of the sidewalk might look like if the parallel parking was replaced with an outdoor seating area constructed just for the summer months.

Step 2-3: Overlay and Trace Hand Drawing. I printed the photo on 11”x17” paper and blocked out the scene with red pencil on tracing paper. On a second sheet of tracing paper, I sketched the scene with a Pentel Sign Pen. Notice that my linework has no tone or texture - which was added later in the coloring step.
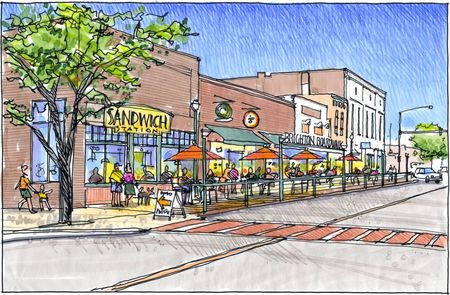
Step 4: Final Marker and Pencil Color. After making a record scan (300dpi) of my line drawing, I colored the scene with Chartpak AD markers and Prismacolor pencils. Colored pencils were great tool for developing the different gradations in the sky, adding texture to the ground plane and delineating the brick on building facades. I scanned the final artwork at 300dpi and saved a jpeg.
Digital Modification in Photoshop

Step 5-6: Photoshop Overlay. I created a new layer in Photoshop that was colored black and then given a 50% transparency. I selected the “multiply” blending mode and then picked a white paintbrush to begin “digital painting” the illuminated portions of the street scene. The paint brush I used had a soft edge to simulate the filtered light.
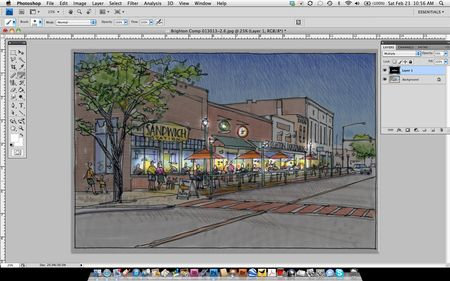
Step 7: Spot Digital Painting. This entire process did not require any special hardware other than my laptop and mouse. As you can see in this interim step, by painting with the color white, I basically removed the gray color where I wanted to emphasize where the light was being sourced from the storefronts, street lights and signage.
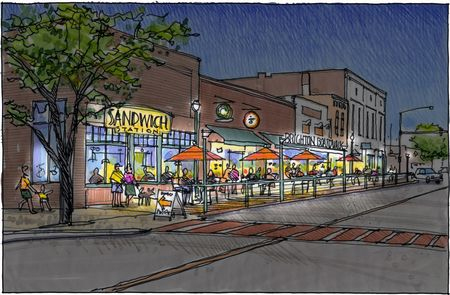
Step 8: Final Digital Effects. I completed the digital modifications in less than ten minutes, saved a .psd file and an extra jpeg of the scene. I slightly darkened the jpeg to increase the illusion of the evening scene. This technique was a great shortcut for converting a day time scene into an evening scene. If needed, you could always add some yellow and orange colors to the scene to reinforce the color of storefront lighting. Try this method with one of your drawings and see if you can achieve the same results!
- Cover Story
-
 SketchUp Can Help You Win Interior..
 -
 Best Laptops for SketchUp
 -
 How to Resize Textures and Materials..
 -
 Discovering SketchUp 2020
 -
 Line Rendering with SketchUp and VRay
 -
 Pushing The Boundary with architectural
 -
 Trimble Visiting Professionals Program
 -
 Diagonal Tile Planning in SketchUp
 -
 Highlights of some amazing 3D Printed
 -
 Review of a new SketchUp Guide
- Sketchup Resources
-
 SKP for iphone/ipad
 -
 SKP for terrain modeling
 -
 Pool Water In Vray Sketchup
 -
 Rendering Optimization In Vray Sketchup
 -
 Background Modification In sketchup
 -
 Grass Making with sketchup fur plugin
 -
 Landscape designing in Sketchup
 -
 Apply styles with sketchup
 -
 Bedroom Making with sketchup
 -
 Review of Rendering Software
 -
 Enhancing rendering for 3d modeling
 -
 The combination of sketchup
 -
 Exterior Night Scene rendering with vray


