
To start of I would like to say that only way to get a very good result is to make your overall model as detailed and realistic as possible. A lot of time I spend in making the model as in real life! Also in the 3D warehouse you can find some very good objects to import in your model, and if you search a little you will find some nice 3ds files of a lot of furniture, especially design furniture (chairs, sofas, ...).
The scene... It is a very simple scene of a small room where the idea was to make it as functional and cosy as possible within the ‘taste’ of the client.
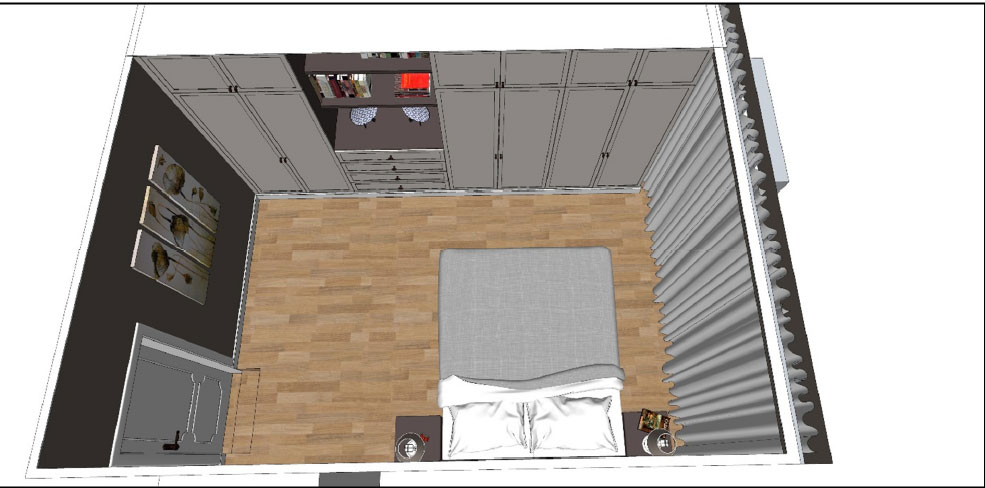
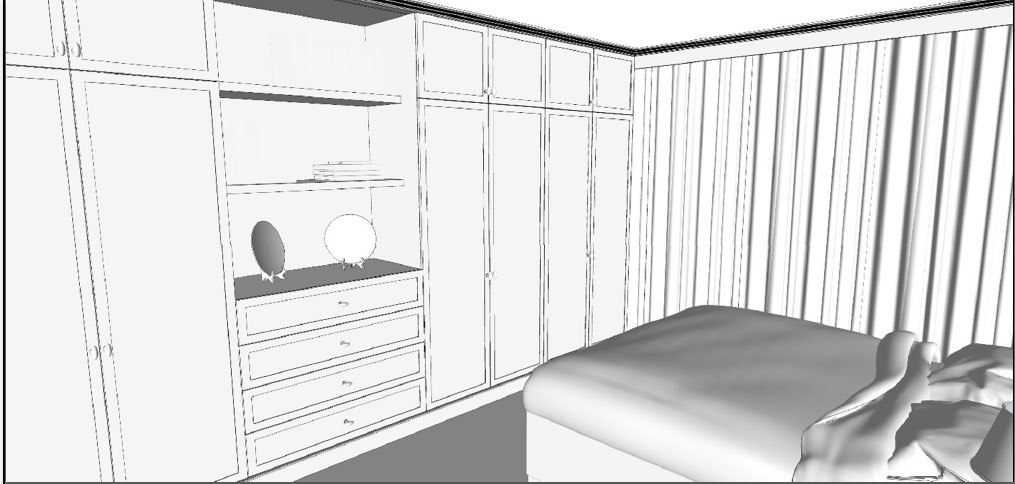
A. Materials:
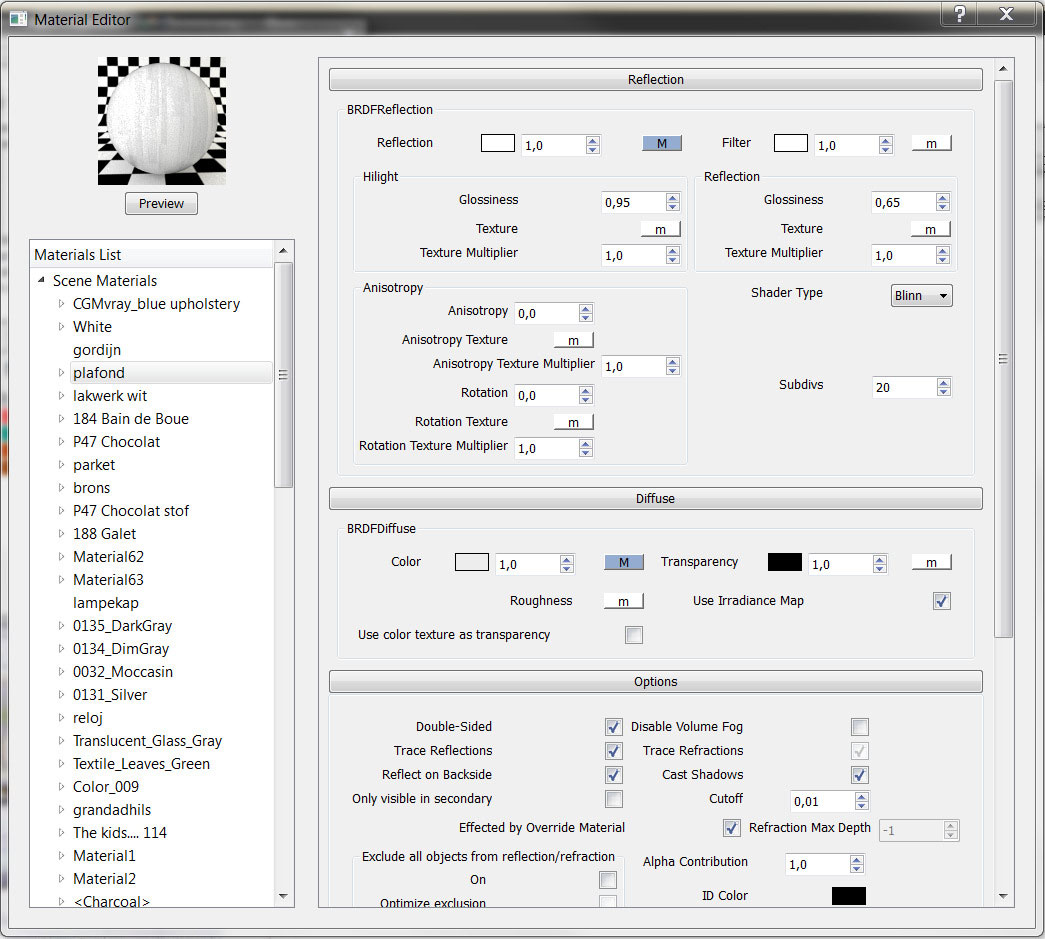
1. Ceiling color: To make your interior render look brighter it helps to make your ceiling and walls reflect a little. I used a diffuse map of a wood floor as my base color, which I made white using Photoshop, but it works with any color. I always use ‘tex fresnel’ as my reflection. In fact, it is the same as the diffuse map I used for the floor, just in a different scale and color!
2. Wall color: The same here, as the ceiling color, I always use a little bit of reflection, to get a more realistic result in the end. It doesn’t matter what color you use.
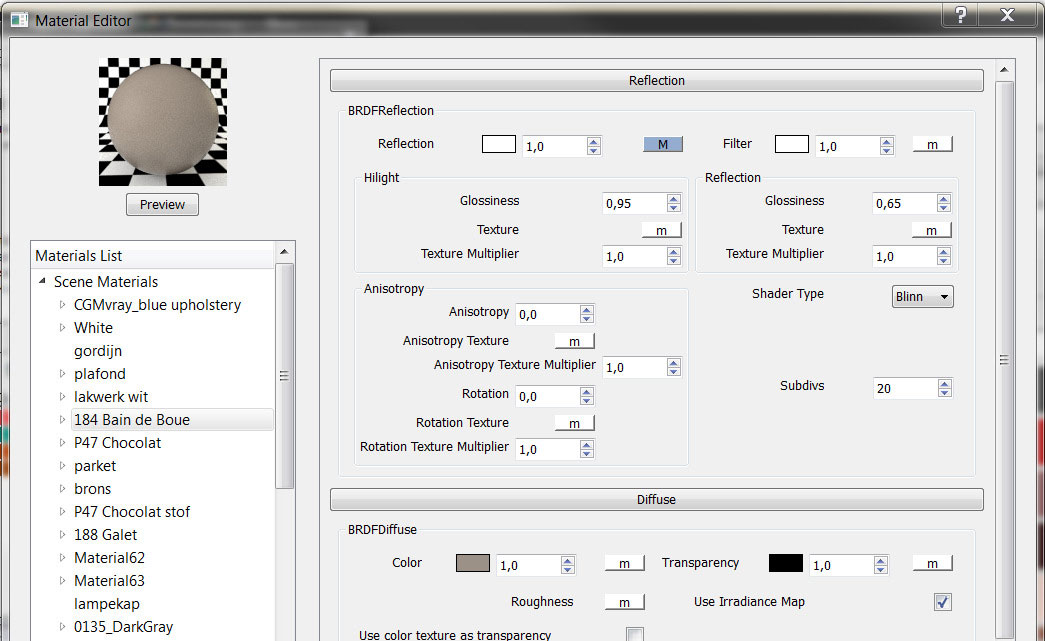
For the striping I used the two colors simultaneously, separating each color as a rectangle.
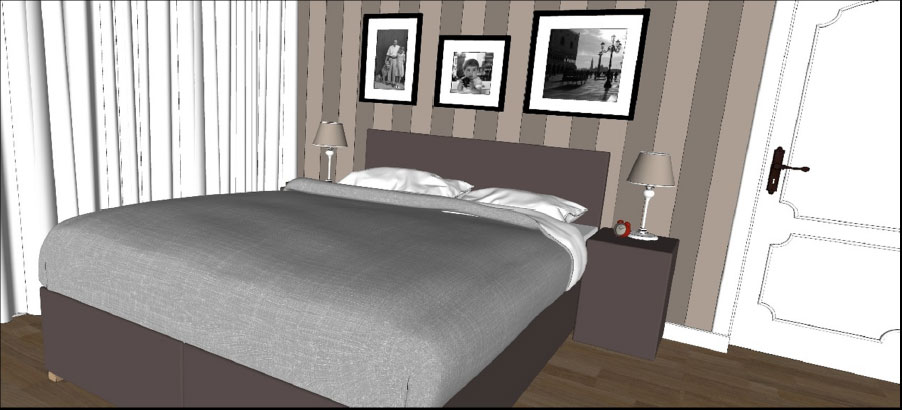
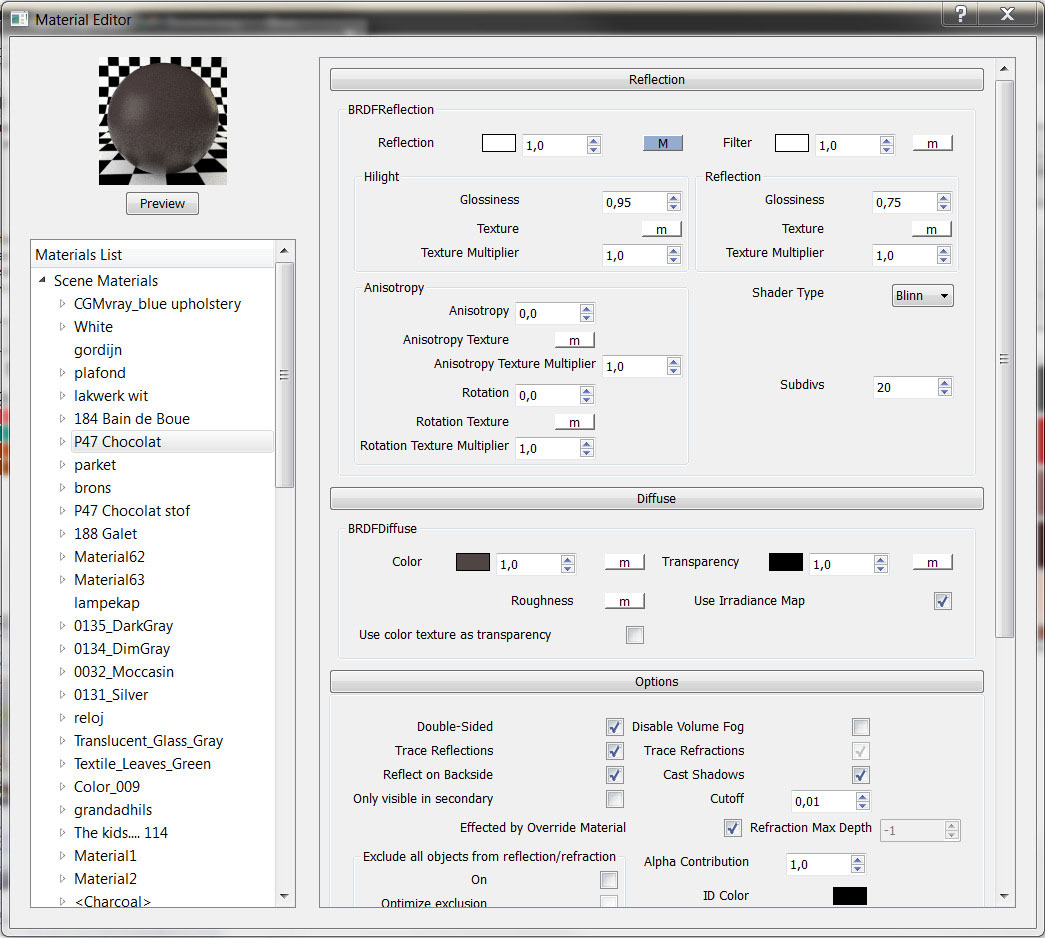
3. Furniture color: Here I use a bit more reflection glossiness, that way the furniture ‘shines’ a bit more than the walls or ceiling.
The picture frames I made using basic pictures I found on the internet, and ‘framed’ them using Fotosketcher. A superb tutorial on this is to be found on the website of Nomeradona.
4. The curtains: This is a double sided material, that way it will become transparent. In this scene I used a basic white color (a default vray material set to white), and then you make a new material, you choose a new ‘two sided material’. Apply the front and back color, set the color to a grey value (125), and make sure you tick the ‘force one sided’ box.
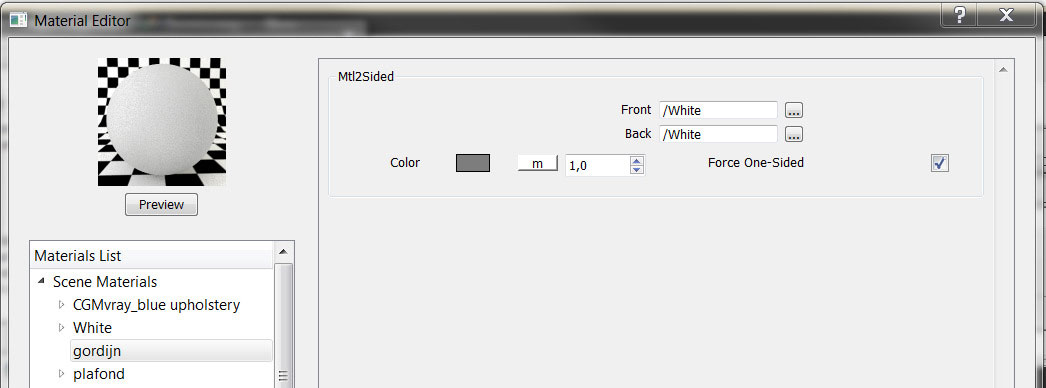
Make sure you group the geometry on wich you apply this material. You can control the transparency even more by adjusting your base material, by making this more transparent in Sketchup. I did the same technique on the lamp shades, so that way, when you place a light in it, it will shine through a bit.
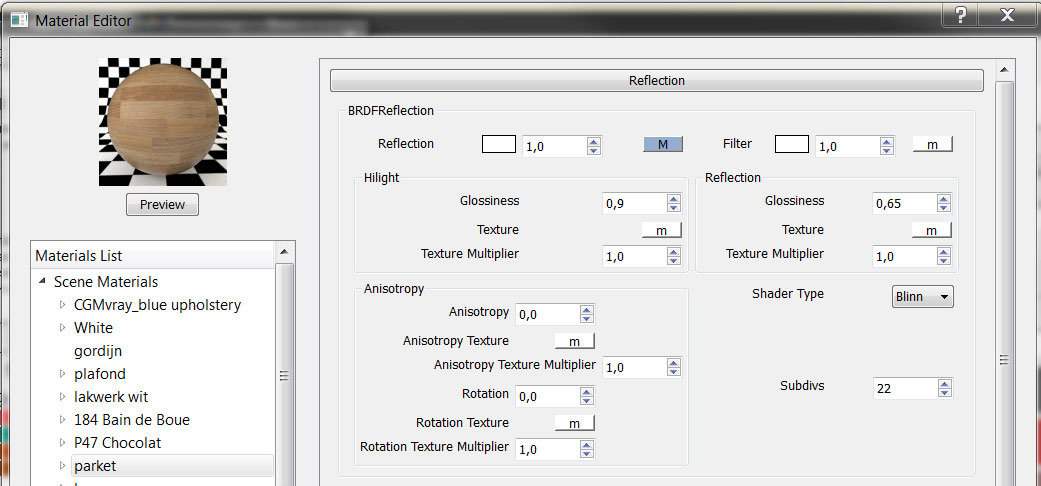
5. Floor: When you look for nice wood floors, or even tiled floors, make sure you use a seamless texture, with the highest resolution as possible. That way you get nice results. And here, the same as on the walls and ceiling, use a bit of reflection.

On this texture, I didn’t use any bump or displacement map.
B. The settings
Usually for me, I find the best results are when I render my models with an HDRI as lightsource. But in this scene it wasn’t necessary, because the entire scene doesn’t have any light coming in from ‘outside’. Instead, also used two omni lights to lighten up the scene:
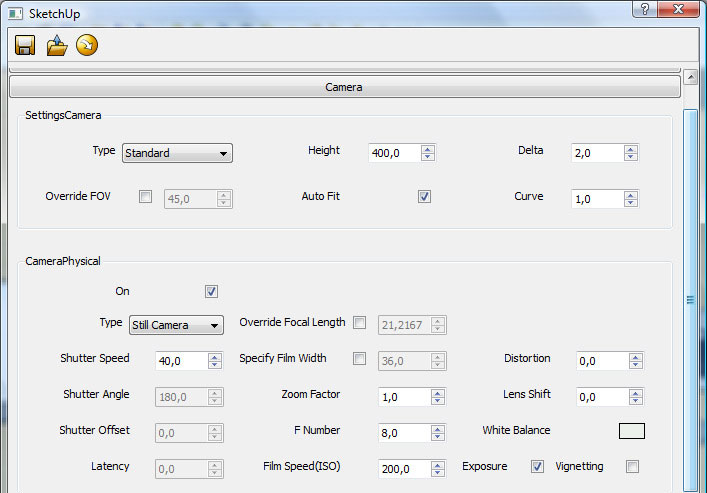
So I start off with the camera settings, I lower the shutter speed to a value between 30 and 50 to brighten up the picture, and also increase the film speed to somewhere between 175 and 225. In this scene, there is no direct light coming through the windows, so you have to brighten up the scene yourself.
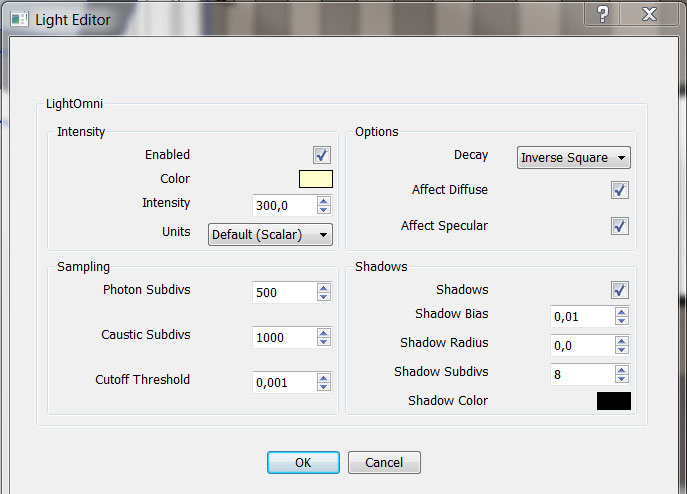
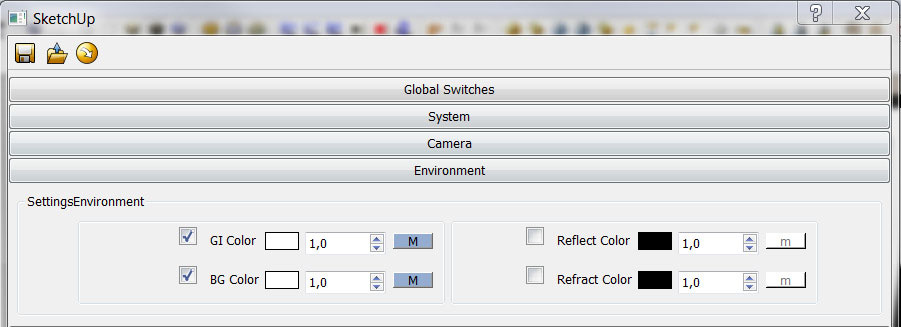
I used the basic sunlight as my source of light, both in my GI color and BG color, values set to white.
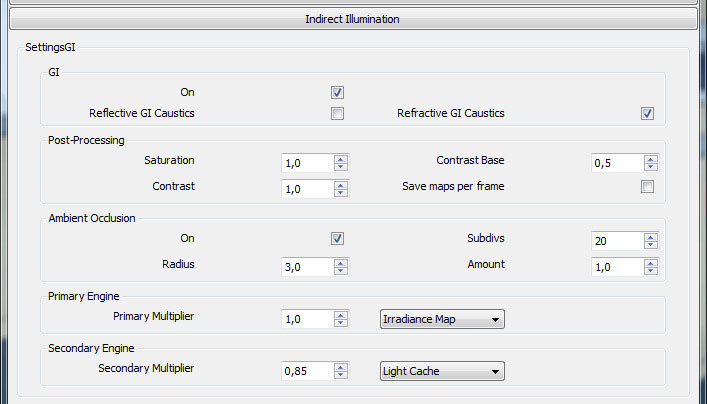
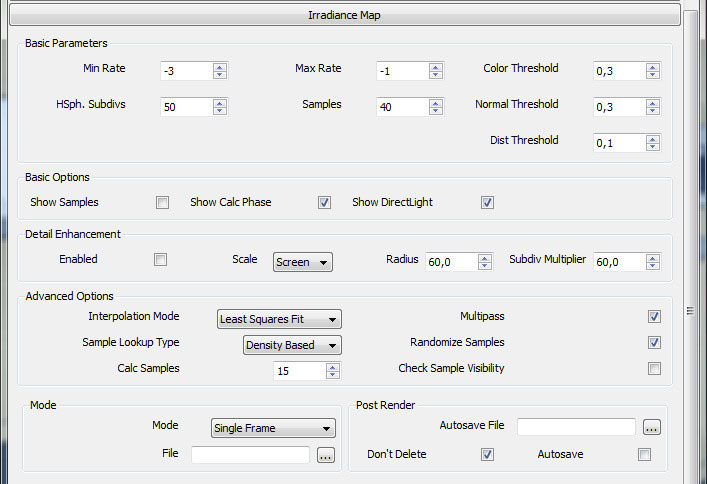
Make sure to activate the ambient occlusion, that way you will get nice clean corners. The more subdivs, the better the result. My primary engine remains the ‘Irradiance map’, the second is the ‘Light cache’…
The settings for the irradiance map.
The only thing I changed are the samples, I increased them to 40.
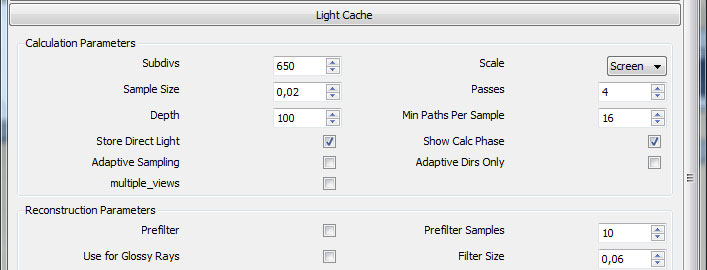
The light cache settings: The higher the value of the subdivs, the better you result, but it will have a direct impact on your render time. So, make sure you adjust it to your needs… I start off with a lower amount of subdivs, and increase it gradually, to improve the final result.
The rest of the settings weren’t changed!
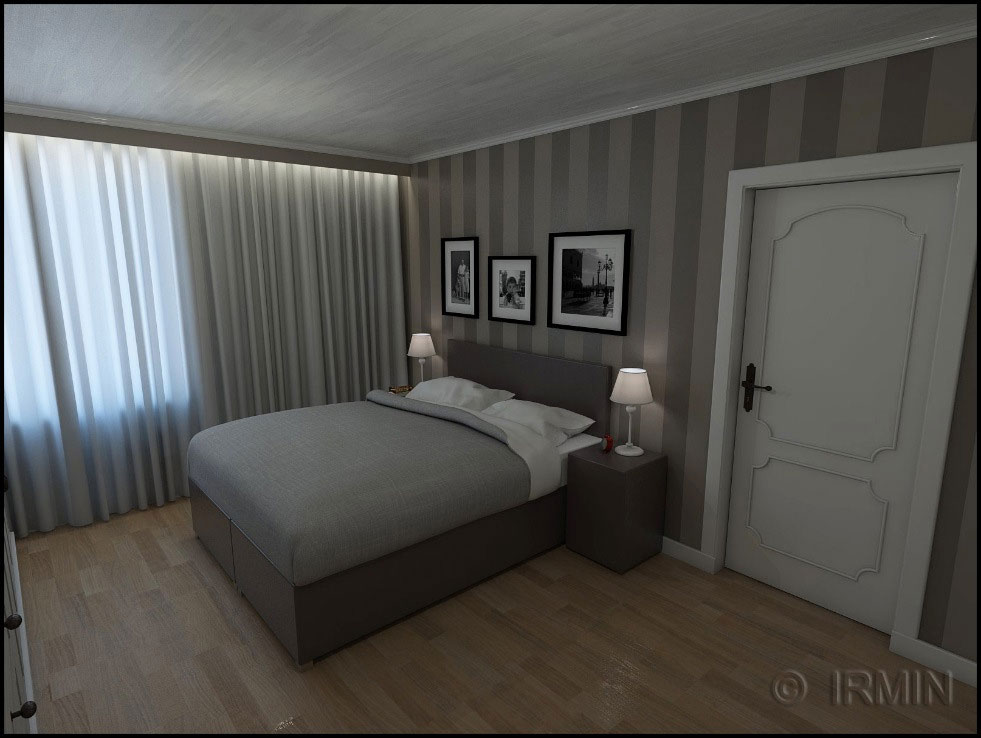
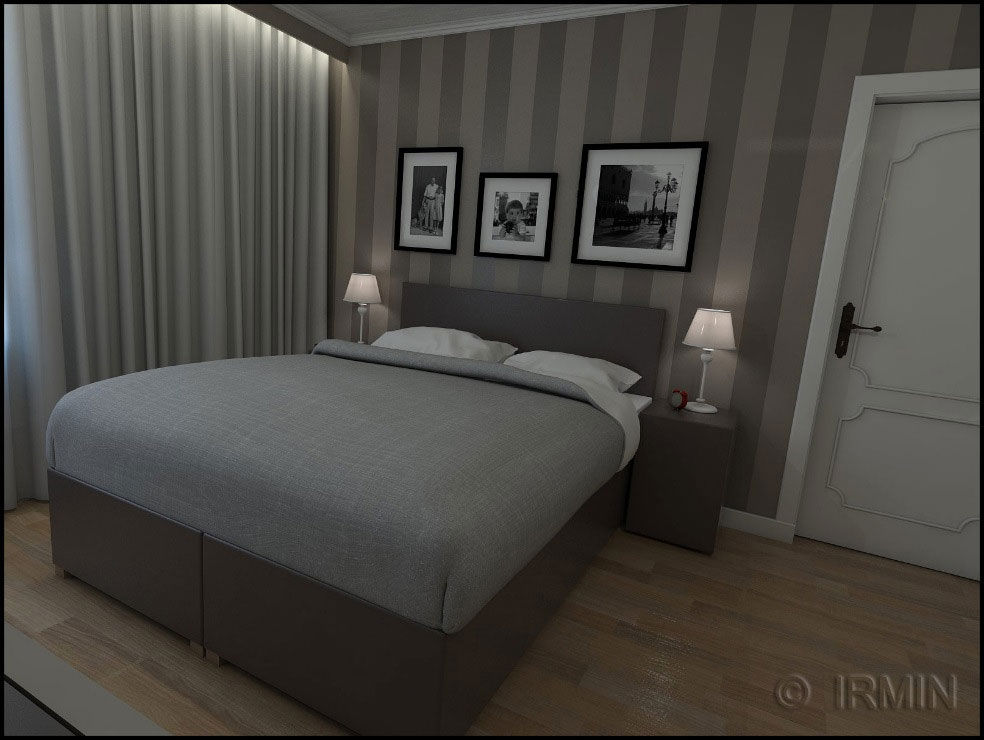
C. The result, without post- processing in photoshop
If you like this article or want to send me a message, please follow me on facebook or twitter (Irmin Verstappen), or take a look at my website www.irmin.be.
- Cover Story
-
 SketchUp Can Help You Win Interior..
 -
 Best Laptops for SketchUp
 -
 How to Resize Textures and Materials..
 -
 Discovering SketchUp 2020
 -
 Line Rendering with SketchUp and VRay
 -
 Pushing The Boundary with architectural
 -
 Trimble Visiting Professionals Program
 -
 Diagonal Tile Planning in SketchUp
 -
 Highlights of some amazing 3D Printed
 -
 Review of a new SketchUp Guide
- Sketchup Resources
-
 SKP for iphone/ipad
 -
 SKP for terrain modeling
 -
 Pool Water In Vray Sketchup
 -
 Rendering Optimization In Vray Sketchup
 -
 Background Modification In sketchup
 -
 Grass Making with sketchup fur plugin
 -
 Landscape designing in Sketchup
 -
 Apply styles with sketchup
 -
 Bedroom Making with sketchup
 -
 Review of Rendering Software
 -
 Enhancing rendering for 3d modeling
 -
 The combination of sketchup
 -
 Exterior Night Scene rendering with vray


