
Merging SketchUp, Digital Drawing and Prismacolors!
Jim Leggitt
I enjoy combining traditional drawing processes with digital tools and couldn't have found a better project to test out some new design communication techniques! For creating this aerial perspective of a college campus, I constructed a Google SketchUp base model, illustrated and colored the perspective using a Wacom Cintiq and finally added character and texture to the image with Prismacolor pencils.
The resulting aerial perspective has the technical accuracy of a computer model and an authentic "hand crafted" feel. This hybrid drawing was for a campus master plan my firm studioINSITE produced. Here is my "step-by-step" process:

Step 1 - Campus Reference Photo. I found a somewhat recent aerial photograph of the campus on the Internet which had valuable information as to the type and location of existing campus trees. The photo also identified roof patterns and building facades that I did not have from site visit photography.
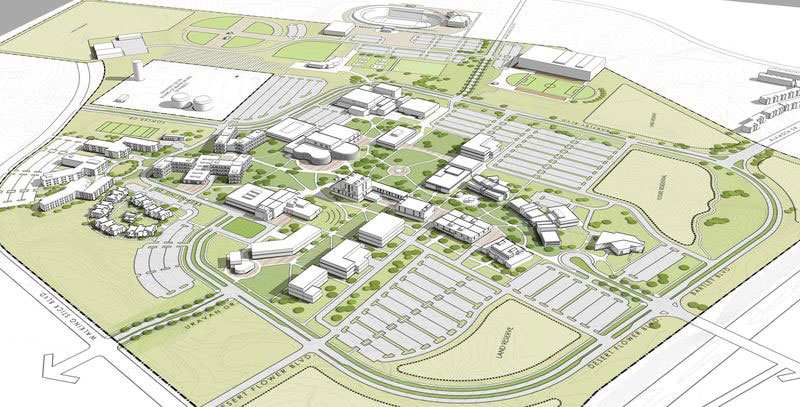
Step 2 - Google SketchUp Model. Importing the illustrative master plan into SketchUp, I constructed the existing and proposed campus buildings with enough basic detail to understand massing and general window patterns. I reviewed several view options with my client and selected this preferred aerial view. I exported a high resolution jpeg and opened it in Adobe Photoshop.
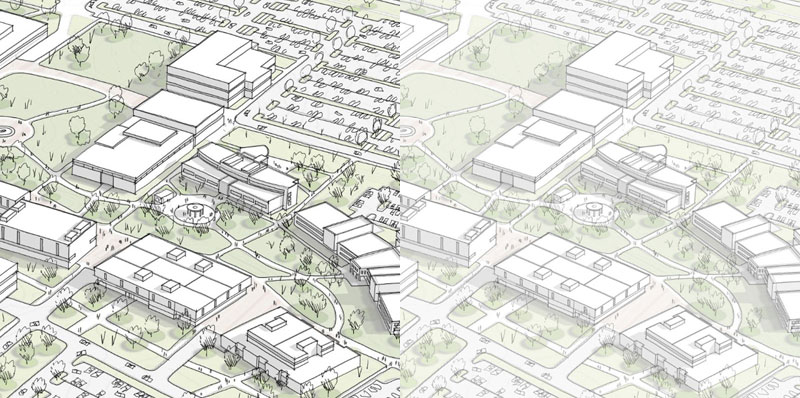
Step 3 - Wacom Cintiq Digital Drawing. With the image open in Photoshop and using my Wacom Cintiq interactive monitor, I illustrated all of the buildings, trees, cars, walks and roads using a digital stylus pen at a 1 pixel pen setting. The base image was faded back to 30% to simplify the tracing process. After completing the digital drawing, I faded back the linework 50% to prepare the illustration for digital color.
Step 4 - Digital Ground Color. Using the Wacom Cintiq, I applied a base of different green colors. Areas close to campus were painted with deeper greens and more natural landscaped areas surrounding the campus were colored with more brown and tan tones.
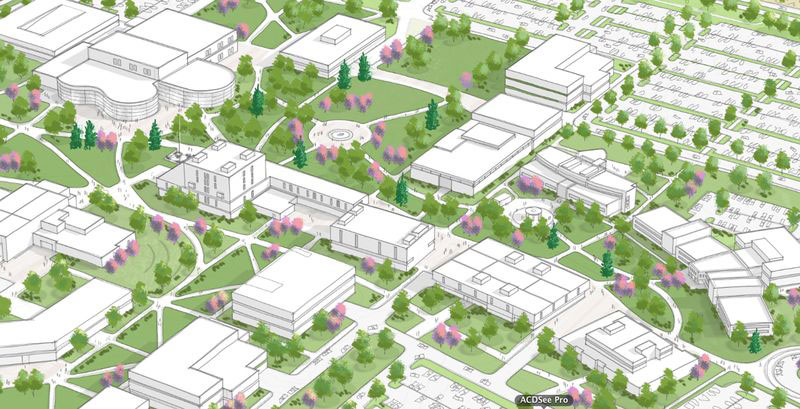
Step 5 - Digital Landscaping. Selecting a new layer in Photoshop, I illustrated all of trees on the campus plan, combining shade trees, ornamental trees and established pine trees in the campus core. Each tree was built up with 2-3 different shades of color.

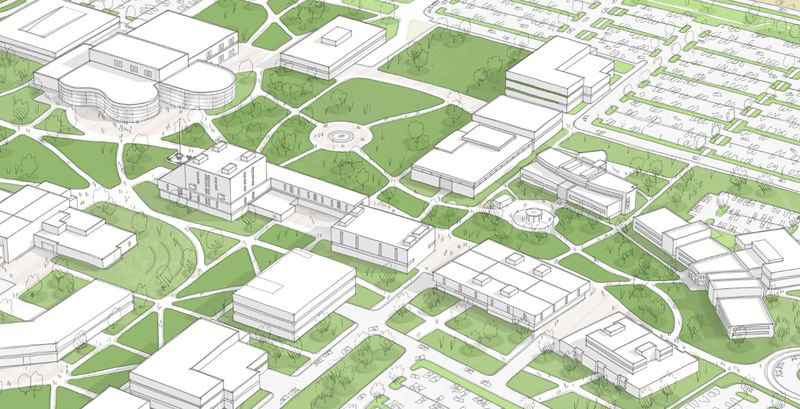
Step 6 - Digital Shadows. I created a new Photoshop layer and painted shadows onto all of the building walls and on the ground beneath trees, cars and campus buildings. I used a dark gray color and adjusted the transparency to achieve the best shadow density in the image.
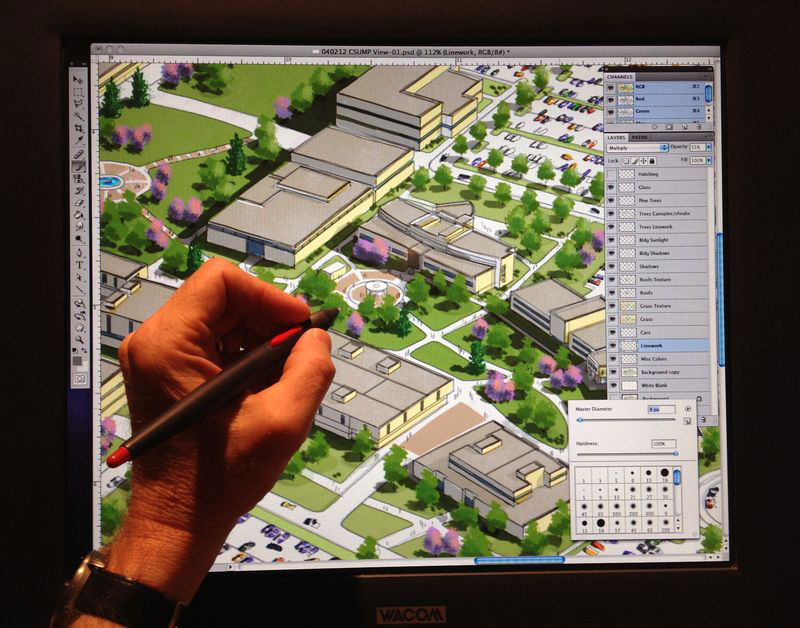
Step 7 - Wacom Cintiq Digital Coloring. This photograph reveals the size of my 15 inch Cintiq monitor and the tool palettes open in Photoshop. Note that there are over 15 different layers representing basic linework, shadows, base color, trees, color surfaces, sun highlights and more.
Cross posted from Jim Leggitt's blog

Step 8 - Final Digital Color. I "fine tuned" the overall illustration by adding some additional digital detail to central plazas, building windows and landscaping. I then saved a jpeg of the illustration and plotted it in color.

Step 9 - Enlarged Color Print. In order to apply colored pencil to an illustration with this much detail and complexity, I enlarged the image to 17" x 34" and printed it onto a matte finish coated paper using a HP 5000 color plotter.
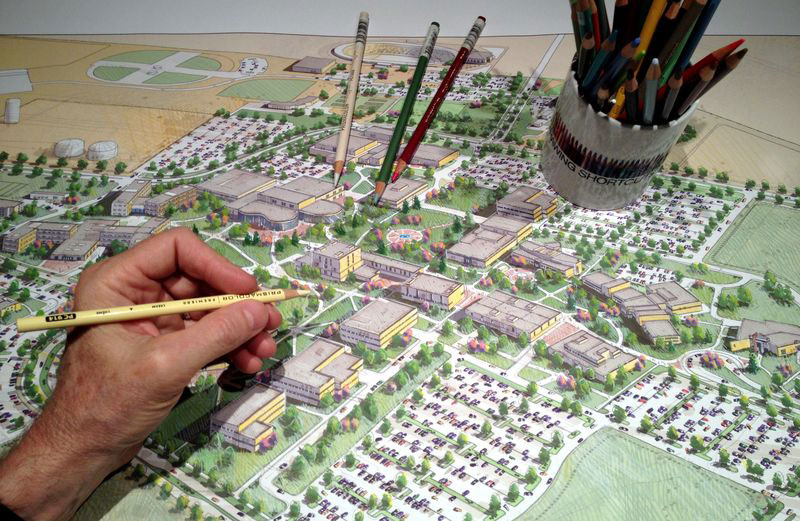
Step 10 - Hand Coloring with Pencils. This was an enjoyable process of adding diagonal hatching, color highlights and overall character to the aerial perspective. I used several light colored Prismacolor pencils to add texture to the ground surfaces, trees and windows. Yellow pencil on the side of buildings simulated a late afternoon sun illuminating the campus. In addition to the colored pencils, I added a few touches of colored markers and some loosely drawn graphite pencils lines to soften the illustration.
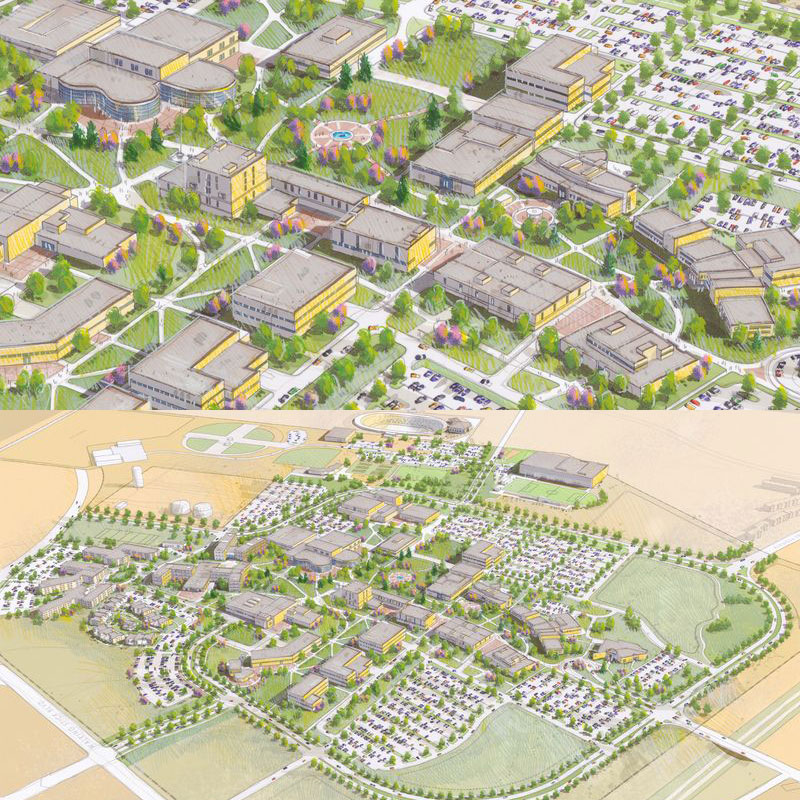
The final aerial perspective had a strong hand-drawn appearance when viewed in its entirety and a great amount of detail that could be viewed when portions of the image were enlarged. If you have access to a Wacom tablet or interactive Cintiq monitor, I encourage you to try a digital drawing and experiment with combining digital tools with traditional drawing methods. The results can be amazing!
Cross posted from Jim Leggitt's Blog


- Sponsored Plugins

- Cover Story
-
 SketchUp Can Help You Win Interior..
 -
Best Laptops for SketchUp
-
How to Resize Textures and Materials..
-
Discovering SketchUp 2020
-
Line Rendering with SketchUp and VRay
-
Pushing The Boundary with architectural
-
Trimble Visiting Professionals Program
-
Diagonal Tile Planning in SketchUp
-
Highlights of some amazing 3D Printed
-
Review of a new SketchUp Guide
- Sketchup Resources
-
SKP for iphone/ipad
-
SKP for terrain modeling
-
Pool Water In Vray Sketchup
-
Rendering Optimization In Vray Sketchup
-
Background Modification In sketchup
-
Grass Making with sketchup fur plugin
-
Landscape designing in Sketchup
-
Apply styles with sketchup
-
Bedroom Making with sketchup
-
Review of Rendering Software
-
Enhancing rendering for 3d modeling
-
The combination of sketchup
-
Exterior Night Scene rendering with vray