
Author : Jim Leggitt
Digital Watercolor with SketchUp Photo Match
I’m always looking for new alternatives for incorporating digital tools with traditional hand drawing and coloring techniques. This visualization method combines a Google SketchUp model that I built using the Photo Match tool with some hand coloring and digital filtering in Photoshop to create a quick rendering.
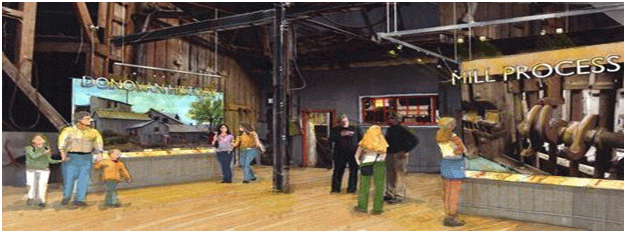
Here are the basic steps in which I was able to transform a digital photograph into a digital watercolor. The subject for this visual was an amazing historic gold processing mill in Nevada. I photographed the building during a site visit and used one of the interior photos as the basis for my rendering.

Step 1. Digital Photography. During a quick visit to the mill site, I took photos of the interior and exterior, trying to capture key elements of the machinery and spaces. Due to low light conditions and small rooms, I wish I had a tripod and a camera with an extra wide angle lens!

Step 2. SketchUp Model. I built a SketchUp “Photo Match” model of the main interior warehouse space that we determined to be an ideal location for interpretive exhibits on mining history and visitor orientation to the gold milling process. Notice how this model is a “stage set” model - constructed only for the single perspective view.
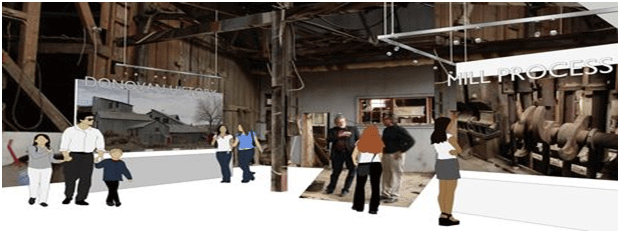
Step 3. Scene Composition. I placed the exhibit displays, people, lighting and graphics into the SketchUp model to create an active scene that resembled a visitor center experience. I’m not that experienced with the SketchUp Photo Match tool and struggled a bit with placing the photo onto the beams and columns.
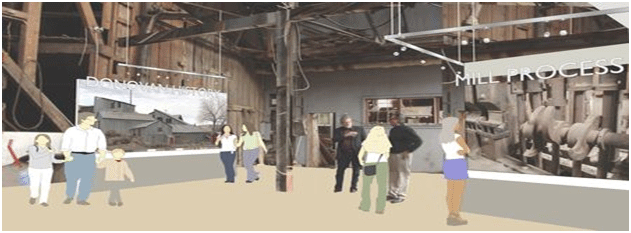
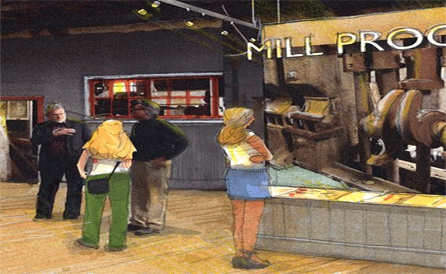
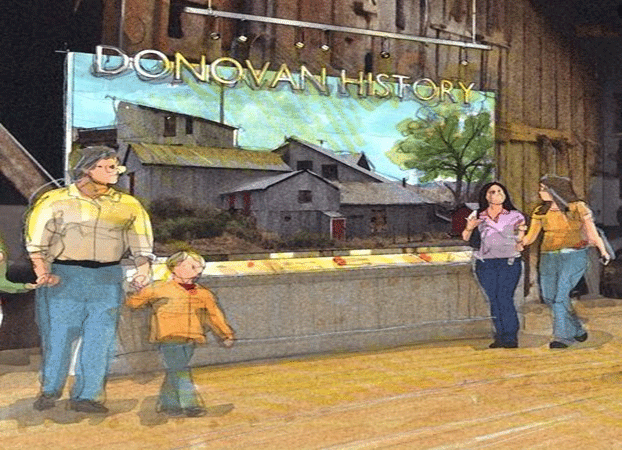
Step 4. Scene Enhancement. After exporting a high resolution jpeg, I eliminated many of the dark clothing colors in Photoshop, added a floor color and lightened the entire image in preparation for adding back color with markers and colored pencils. Compare this modified view with the original scene (step 3) exported from SketchUp.
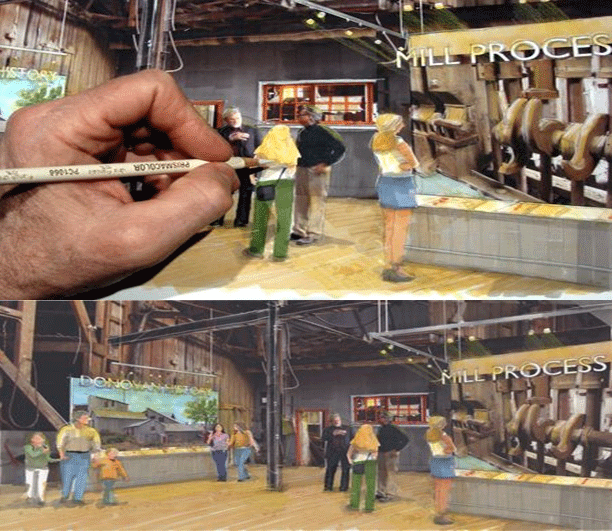
Step 5. Hand Coloring. I printed the view 11”x17” on heavy weight matte finish Epson presentation paper using my Epson Workforce 1100 printer. I added light colored markers to the flooring, exhibit displays and people. Using a very hard mechanical pencil, I loosely traced over the objects in the scene in order to reinforce the “hand drawn” character of the rendering. I enhanced the overall image with white colored pencil highlights and yellow pencil to emphasize the interior spot lighting.
Step 6. Scan and Watercolor Filter. I scanned the completed rendering at 300dpi and then applied a Photoshop watercolor filter to the image which softened the linework and produced an overall painted look to the rendering similar to that of an actual watercolor! I finally adjusted the contrast levels by darkening the blacks and lightening the whites of the image.
Cross Posted from Jim Leggitt’s Blog

- Sponsored Plugins


- Sponsored Plugins

- Cover Story
-
 SketchUp Can Help You Win Interior..
 -
Best Laptops for SketchUp
-
How to Resize Textures and Materials..
-
Discovering SketchUp 2020
-
Line Rendering with SketchUp and VRay
-
Pushing The Boundary with architectural
-
Trimble Visiting Professionals Program
-
Diagonal Tile Planning in SketchUp
-
Highlights of some amazing 3D Printed
-
Review of a new SketchUp Guide
- Sketchup Resources
-
SKP for iphone/ipad
-
SKP for terrain modeling
-
Pool Water In Vray Sketchup
-
Rendering Optimization In Vray Sketchup
-
Background Modification In sketchup
-
Grass Making with sketchup fur plugin
-
Landscape designing in Sketchup
-
Apply styles with sketchup
-
Bedroom Making with sketchup
-
Review of Rendering Software
-
Enhancing rendering for 3d modeling
-
The combination of sketchup
-
Exterior Night Scene rendering with vray