
sketchup, sketchup tutorials, sketchup tips, sketchup plugins, armedia, vray
Author : Klara Theresya
3D Carving Tutorial
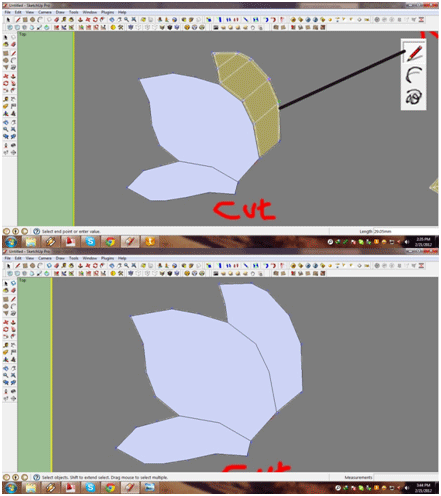
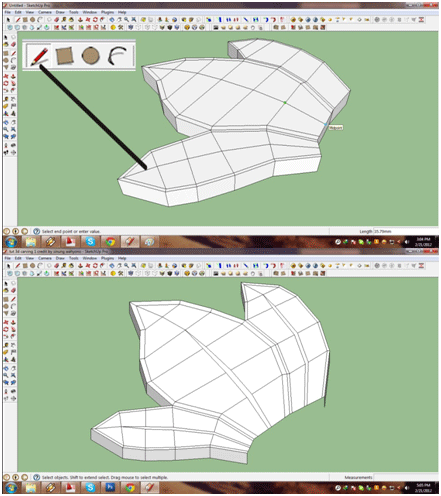
1. Make pattern as image displays, you can download the image in http://3dcarving.blogspot.com/2012/01/blog-post.html#more, download the third image.
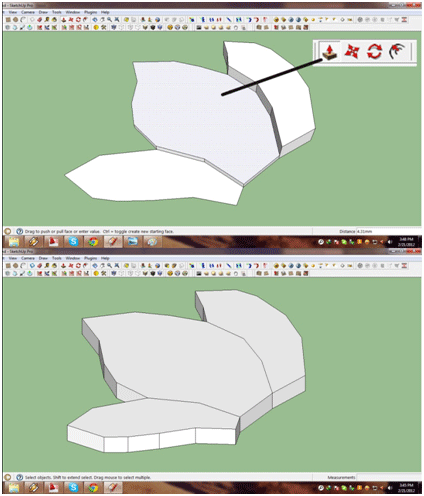
2. Pull the pattern up.
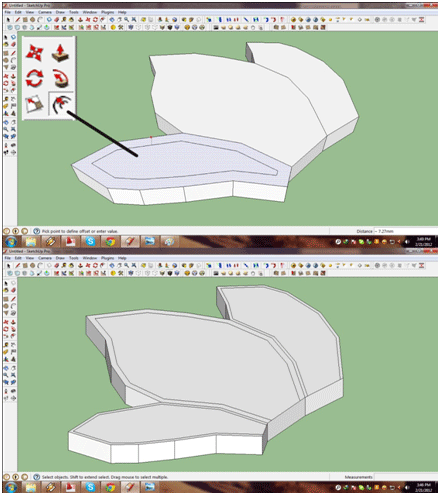
3. Offset the surface.
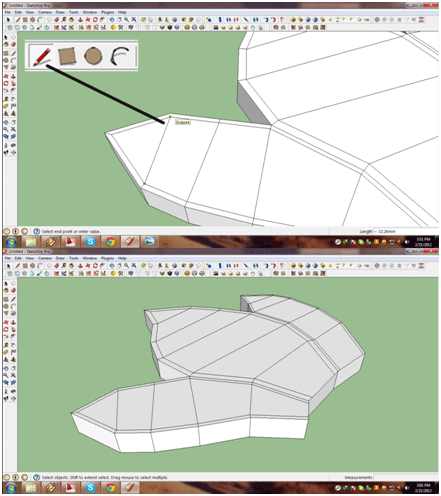
4. Connect all the lines.
5. Make additional lines in the middle of the pattern with Line Tool.
6. Select the blue lines then move them down using Move Tool.

7. Push down the surfaces in the middle.
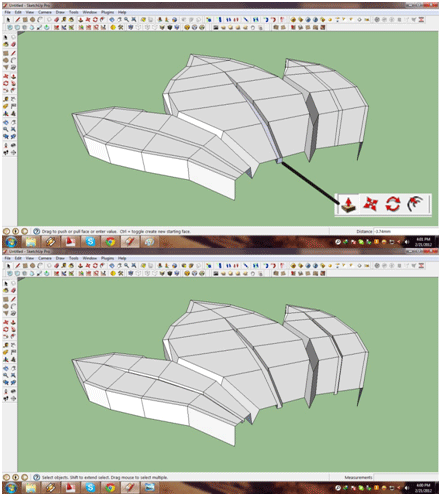
8. Select the blue lines then move them up with Move Tool.
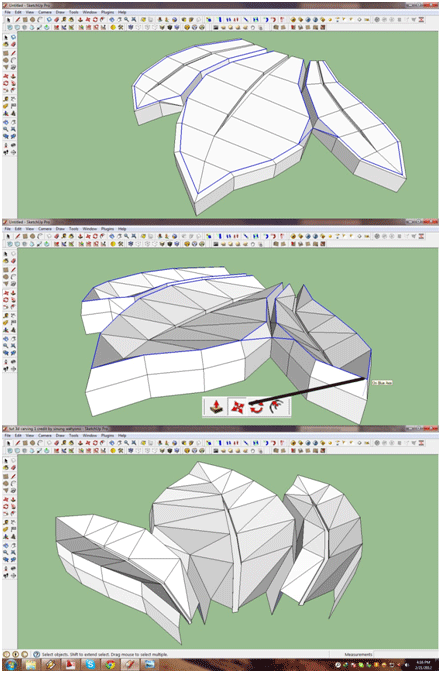
9. Triple click on the object then use Subdivide & Smooth (Artisan plugin) twice for smooth result.

What do you think about this article

- Sponsored Plugins


- Sponsored Plugins

- Cover Story
-
 SketchUp Can Help You Win Interior..
 -
Best Laptops for SketchUp
-
How to Resize Textures and Materials..
-
Discovering SketchUp 2020
-
Line Rendering with SketchUp and VRay
-
Pushing The Boundary with architectural
-
Trimble Visiting Professionals Program
-
Diagonal Tile Planning in SketchUp
-
Highlights of some amazing 3D Printed
-
Review of a new SketchUp Guide
- Sketchup Resources
-
SKP for iphone/ipad
-
SKP for terrain modeling
-
Pool Water In Vray Sketchup
-
Rendering Optimization In Vray Sketchup
-
Background Modification In sketchup
-
Grass Making with sketchup fur plugin
-
Landscape designing in Sketchup
-
Apply styles with sketchup
-
Bedroom Making with sketchup
-
Review of Rendering Software
-
Enhancing rendering for 3d modeling
-
The combination of sketchup
-
Exterior Night Scene rendering with vray