
Author : Mike Tadros
The Product connect plugin for SketchUp
Mike Tadros
President/Co-Founder
Igloo Studios, Inc.
Having the ability to quickly import accurate SketchUp models of real products into a project has been a dream of mine since back in 2003, when I first started using SketchUp. Since then, it's been an ongoing endeavor at Igloo Studios to try and realize that dream.
Over nearly a decade, that mission has resulted in having worked with more than 70 manufacturers. We've modeled plumbing fixtures, appliances, windows, doors, cabinets, tile and all sorts of other cool products. Because of my background in architecture, I've always been focused on creating product models that professional designers would want to use in their SketchUp projects. Our efforts have resulted in thousands of product models uploaded to the 3D Warehouse, great ROI for our manufacturer clients, and a lot of positive feedback from designers.
Over the course of many years working with manufacturers and SketchUp users on this mission, we realized that having a pretty model of a product only solves part of the problem. As professionals, we need to take the product decisions we make during the design process and do things with those products and their information. So, we created the Product Connect plugin, which helps users manage and report on the products in their projects.
With the newest version of Product Connect (released in March of this year), we've made working with real world products in SketchUp a lot better. The new version makes it easy to find all the freely available, real world product models on the 3D Warehouse, gives designers the ability to turn components and materials into products that they can report on, and includes some great improvements to our existing Report Maker tool. We also added even more product connect enabled models (models that include manufacturer verified product data) to the warehouse.
Since March, thousands of designers have downloaded Product Connect from the Igloo Studios website affirming the need for it's existence. In addition, the product models that have been uploaded by Igloo Studios on behalf of the manufacturers we work with, continue to be among the most frequently downloaded models on the 3D Warehouse - collectively having been downloaded over 3.4 million times!
The following article is an introduction to some of the tools and features that have been introduced with the most recent release of Product Connect. We hope you'll give it a shot. Our goal is to provide designers with models and tools that help get the job done. So your feedback is appreciated!
WHAT IS PRODUCT CONNECT
Product Connect is a two-part productivity enhancement solution for professional designers.
Part 1 is the Product Connect plug-in which you can download for free from igloostudios.com/productconnect/app.
Part 2 consists of thousands of Product Connect enabled Dynamic SketchUp components that you can search for and download from the Product Connect for SketchUp collection on the Google 3D Warehouse.
Download and Installation
The Product Connect plug-in for Sketchup is freely download-able from the Igloo Studios website: igloostudios.com/productconnect/app.
After filling out the registration form, you will receive an email confirmation. The email confirmation includes a link that will take you to a web page where you can choose to download either the MAC or Windows installer for the plug-in.
After downloading and running the appropriate installer, you'll need to quit/close and re-launch any open instances of Google SketchUp.
The Product Connect toolbar (see Figure 1) should then be visible once SketchUp re-launches.
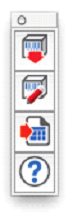
Figure 1. The Product Connect toolbar.
If for some reason the Product Connect toolbar does not show up automatically, you can turn it on by going to View > Toolbars > Product Connect.
The current version (v0.3) of the Product Connect Plug-in includes the following tools:
• Get Products
• Product Editor
• Report Maker
• Help
Using the Get Products Tool
One of the most useful aspects of Product Connect, are the thousands of Product Connect enabled product models that we've made available for download from the Google 3D Warehouse.
The Get Products tool is located in the Product Connect toolbar (View > Toolbars > Product Connect; see Figure 2); and is also located in the following menus:
File > Product Connect > Get Products.
Plugins > Product Connect > Get Products.
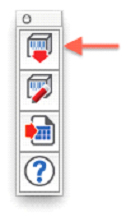
Figure 2. The Get Products tool is located in the Product Connect Toolbar.
Choosing Get Products will launch a 3D Warehouse browser that defaults to the Product Connect for Google SketchUp collection (see Figure 3).
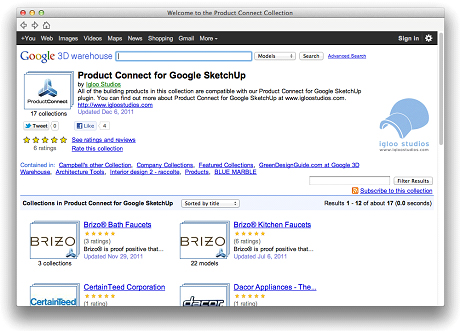
Figure 3. The Product Connect for SketchUp collection contains Product Connect Enabled Components, Building Product Manufacturer Catalogs, and the Product Connect Gallery.
From there you're free to browse catalogs of Product Connect Enabled Components, other Building Product Manufacturer Catalogs, or the Product Connect Gallery.
Using the Product Editor Tool
Even though thousands of Product Connect enabled components are available for you to download from the 3D Warehouse, there are countless numbers of other product models on the warehouse that you might want to include in your projects and in your reports. Plus there are any number of models that you may have created from scratch. Which is why we designed Product Editor to allow you to add or edit information about ANY component.
The Product Editor tool is located in the Product Connect toolbar (View > Toolbars > Product Connect; see Figure 4); and is also located in the following menus:
Tools > Product Connect > Product Editor
Plugins > Product Connect > Product Editor
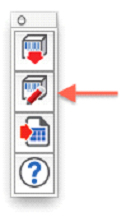
Figure 4. The Product Editor tool is located in the Product Connect Toolbar.
In this example, you'll see how to use Product Editor, to edit the attributes for any of the Product Connect enabled components that you download from the Google 3D Warehouse. Keep in mind however, that Product Editor can also be used to add information to generic component models that you've downloaded from the 3D Warehouse, or drawn from scratch. You can learn more about these other use cases here.
For example:
1) Open a new or existing SketchUp project.
2) Choose Get Products and click through to the Product Connect Enabled Components collection.
3) Browse for and download a Product Connect enabled component from an available catalog (e.g. Brizo, Kraftmaid, etc.)
4) After placing the downloaded component into your project, ensure the product model is selected and then choose Product Editor.
Note: Product Editor will display a list of any pre-selected components. If nothing in the model is selected, Product Editor will display a list of all In Model components (including any components that may be hidden). The latter may take a while depending on the complexity of your project.
5) Click on the component model that appears in the Product Editor list.
Product Editor will display a preview icon of the component along with the Product Name, Product Type, and Component Definition. Below, is a form containing attributes that pertain to the product's default product type (e.g. Plumbing, Cabinet, etc.).
6) Along the top of the form are two drop-down menus for choosing a Product Type and Reporting Method. Review the Product Type (e.g. Plumbing) and Reporting Method and make any desired changes (for details on the different reporting methods, see below).
7) After specifying a product type, you then have the ability to edit/enter information into the fields below. For example, you could input a dollar amount into the Unit Price field.
8) Click the Save Product Info button in the bottom right corner of the Product Editor window.
9) Close the Product Editor window to return to the model.
Using the Report Maker Tool
When you click Report Maker, the tool scans your model for Product Connect enabled components, a process which may take a few seconds, depending on the complexity of the model.
The Report Maker tool is located in the Product Connect toolbar (View > Toolbars > Product Connect; see Figure 5); and is also located in the following menus:
Tools > Product Connect > Report Maker.
Plugins > Product Connect > Report Maker.
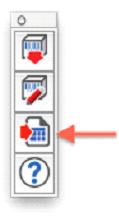
Figure 5. The Report Maker tool is located in the Product Connect Toolbar.
Note: The Product Connect Gallery includes a number of project files that we've uploaded to the Google 3D Warehouse in case you feel like using them to test Report Maker.
The Report Maker dialog then gives you the ability to choose which reports you want to export (see Figure 6). If Report Maker finds a product in the model that matches a report type, that report will be selected automatically.
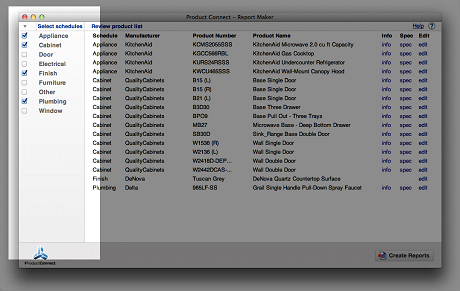
Figure 6. The Report Maker Dialog, Highlighting Step 1: Selecting Product Schedules.
The Review pane will dynamically load a list of the components that will appear in the selected reports (see Figure 7).
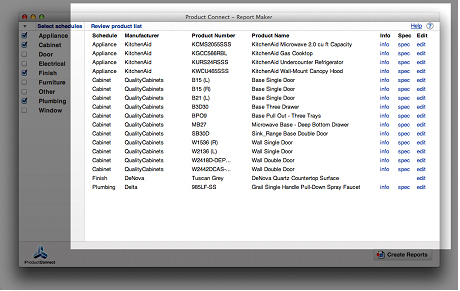
Figure 7. The Report Maker Dialog, Highlighting Step 2: Reviewing the List of Components that Report Maker has found in your model.
To the far right of each listed entry in the review pane, you'll see an edit link. Clicking the edit link will open a Product Editor window for that component. This feature is intended to allow you to make last minute changes before exporting your reports.
When you're ready, click Create Reports 
Report Maker will ask you to choose the folder that you want your reports to be saved in. By default, the reports will be saved to the same folder that your SketchUp model is saved in - but you're welcome to choose a different folder. When you click save, Report Maker will generate the specified reports in CSV format.
Once the files are saved, a handy link is provided in the Report Maker window. Clicking the link will open the file folder containing the reports you've saved.
You can then open the CSV files in a spreadsheet editing application such as Excel, MAC Numbers or Google Spreadsheets to modify, add, or re-format the information.
Keep in mind, when running Report Maker, that you have the option to pre-select specific components in the model, in which case, Report Maker will report on just those products. With nothing selected, Report Maker will report on all of the Product Connect enabled components it finds in the model.
Additional resources:
• The Help Center pages on the Igloo Studios website provide additional Help articles and video tutorials.
• Video Tutorial series about Product Connect is available on YouTube
• The SketchUp Show #66: Using Product Connect Enabled Materials - YouTube
About the Author:
Mike Tadros is the President and Cofounder of Igloo Studios, Inc., author of Real World Google SketchUp 7 (Peachpit Press), and host of The SketchUp Show video tutorial series. As a SketchUp authorized trainer, Mike has taught thousands of professional designers from around the world to use SketchUp, LayOut, and Google Earth.
About Igloo Studios, Inc.:
Igloo Studios, Inc. is an official SketchUp business partner. Igloo Studios is focused on creating models, tools and training for the design and building industry. Igloo provides SketchUp modeling and data support services to product manufacturers who are interested in having their product catalogs available for download from the 3D Warehouse, as well as consulting services for companies who are interested in creating and managing content in-house.
If you have an existing collection of SketchUp components that you'd like to enable for Product Connect, Igloo Studios offers a service for upgrading existing components. Or if you don't already have product models created, Igloo Studios can help you with that too. Contact them for more information.

- Sponsored Plugins


- Sponsored Plugins

- Cover Story
-
 SketchUp Can Help You Win Interior..
 -
Best Laptops for SketchUp
-
How to Resize Textures and Materials..
-
Discovering SketchUp 2020
-
Line Rendering with SketchUp and VRay
-
Pushing The Boundary with architectural
-
Trimble Visiting Professionals Program
-
Diagonal Tile Planning in SketchUp
-
Highlights of some amazing 3D Printed
-
Review of a new SketchUp Guide
- Sketchup Resources
-
SKP for iphone/ipad
-
SKP for terrain modeling
-
Pool Water In Vray Sketchup
-
Rendering Optimization In Vray Sketchup
-
Background Modification In sketchup
-
Grass Making with sketchup fur plugin
-
Landscape designing in Sketchup
-
Apply styles with sketchup
-
Bedroom Making with sketchup
-
Review of Rendering Software
-
Enhancing rendering for 3d modeling
-
The combination of sketchup
-
Exterior Night Scene rendering with vray