
Mixing Styles in Google SketchUp
Bonnie Roskes
You've probably played around with SketchUp's styles, to see how your models look with different edge styles, face colors, and backgrounds. This project will show you how to mix styles - how to combine properties from existing styles to create a new style.
For this project, it helps to have some basic knowledge of Google SketchUp (though detailed instructions are provided). In particular, it's important to know how to zoom, rotate, and pan the view. If you need more information on how to get started, and a description of some basic tools, please read 3DVinci's Getting Started Guide (PDF):
PC users: go to http://www.3dvinci.net/SketchUp_Intro_PC.pdf.
Mac users: go to http://www.3dvinci.net/SketchUp_Intro_MAC.pdf.
Step 1: Set Up a Generic Model
1. Open Google SketchUp. If your file contains a person standing on the ground near the origin, click the Eraser tool and erase him / her.
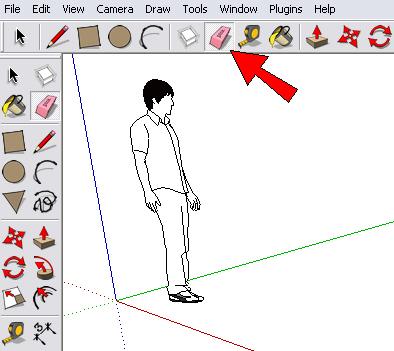
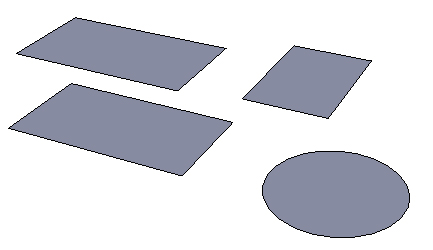
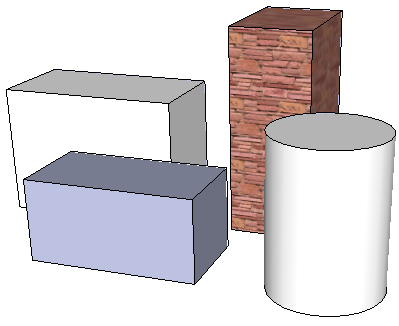
2. We're going to make a generic-looking model, just to test out the various line types and colors of the various styles. So start by making a few shapes on the ground.
3. Activate Push/Pull and make each shape 3D.
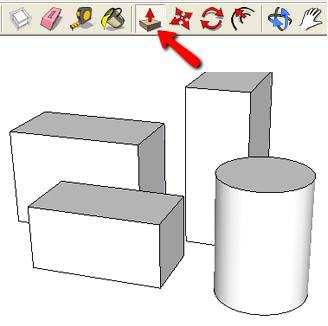
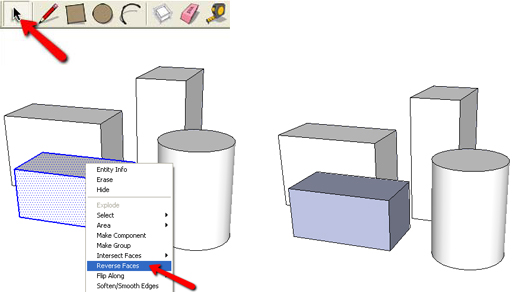
4. We'll now turn one shape "inside out," so that its back faces will show on the outside. Activate the Select tool (or press the Spacebar), and triple-click on any shape, which selects all faces and edges of just that shape. Right-click on one of the selected face and choose Reverse Faces.
5. Finally, click the Paint Bucket tool and select a material or solid color that you like, and paint one entire shape with it. If you press the Ctrl (PC) or Option (Mac) key while clicking one of the faces, the entire shape will get painted.
Step 2: Try Out Some Styles
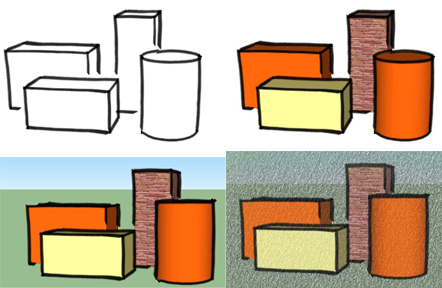
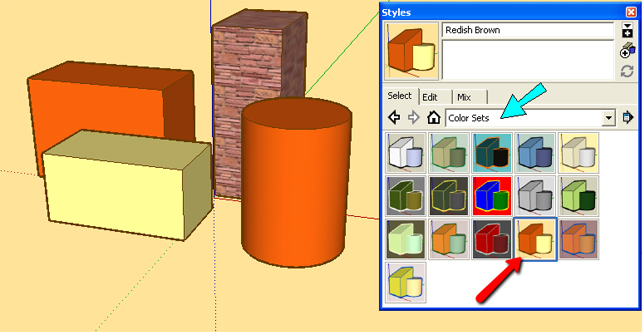
1. To open the Styles window, choose Window / Styles from the main menu. Open the folder called "Color Sets" and click the thumbnail shown below, whose name is "Redish Brown." Now all of the front faces are orange, back faces are yellow, and the background is light orange. The faces that were already painted with another color or texture keep that color - the front and back colors only apply to unpainted faces.
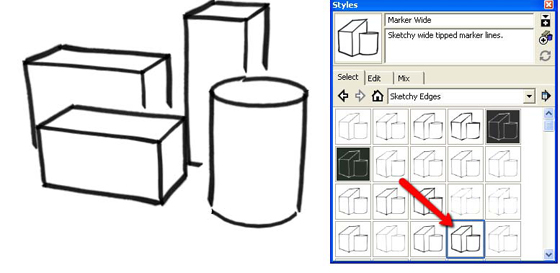
2. Now open the "Sketchy Edges" folder and click a style that has thick, black edges. The style shown below is called "Marker - Wide." This style has all white faces and a white background.
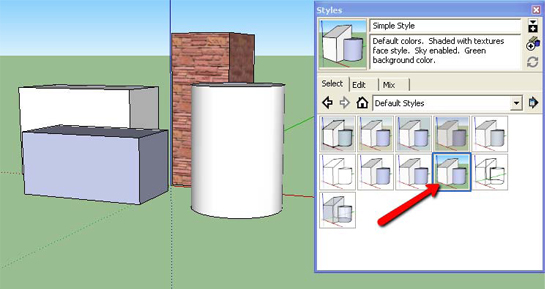
3. Next, open the "Default Styles" folder and activate "Simple Style." You might recognize this one - it's the style for some of SketchUp's default templates. It has a green ground and blue sky (you may have to orbit around to see this divided background), and the model axes are displayed.
4. For the last style, open "Assorted Styles" and click "PSO Vignette." This style has sketchy edges with endpoints, a ground and sky (they are a bit hard to tell apart), and a snowy overlay - this is a watermarked style.
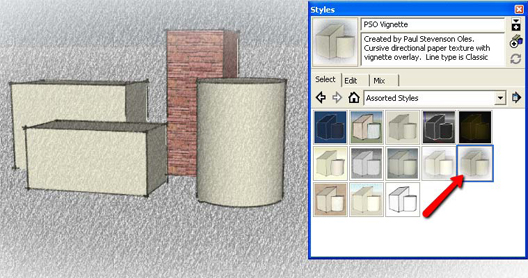
Creating your own watermarked style will be covered in a future project.
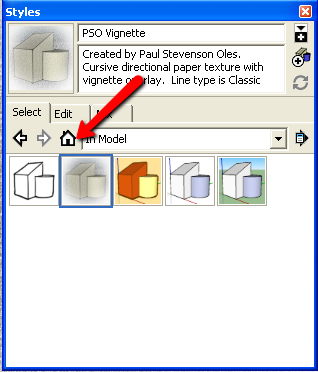
5. To see all of the styles you've used so far, click the house icon on the Styles window. This lists all "In Model" styles.
Step 3: Mix Styles
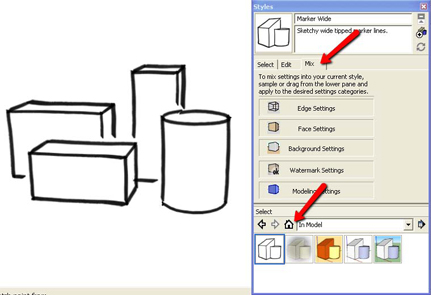
1. First, make the all-white sketchy edge style active. Then on the Styles window, click the Mix tab. This opens a second pane at the bottom of the Styles window. The bottom pane is where you can browse styles; click the house icon to see the list of the "In Model" styles.
2. Say you like the hand-drawn looking edges of the current style, but want the faces to have some color - the colors of the "Redish Brown" style. To bring the face properties of "Redish Brown" into the current style, first click that style at the bottom of the Styles window. Then at the top part of the window, click the box for "Face Settings."
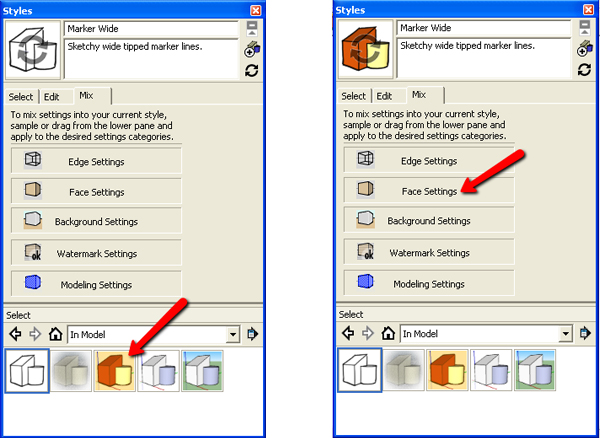
You can also drag the "Redish Brown" thumbnail and drop it into the "Face Settings" box.
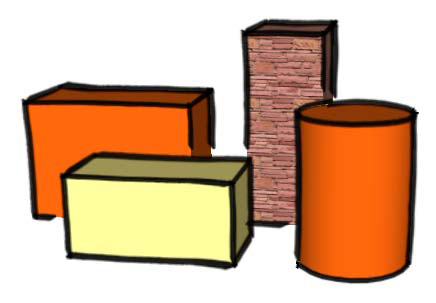
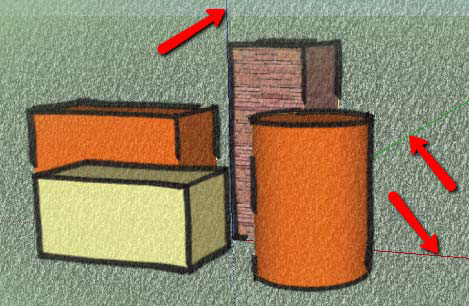
Here's the result: sketchy edges and yellow and orange faces.
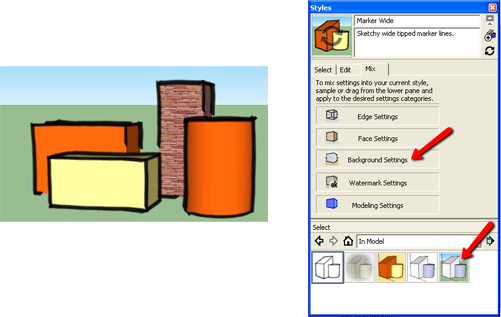
3. To make the background all light orange you could drag "Reddish Brown" onto the "Background Settings" box. But let's use the background from a different style: Drag "Simple Style" into "Background Settings."
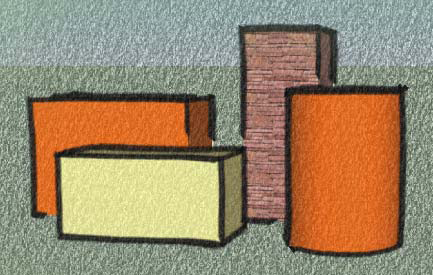
4. Finally, to get that neat, snowy effect, drag "PSO Vignette" into "Watermark Settings." You can still see the blue and green background from "Simple Style," though it's not so clear through all that snow.
5. We haven't used the "Modeling Settings" box yet - these properties are a set of other display features such as hidden geometry, section plans, and axes. As an example, drag any style that shows the model axes into "Modeling Settings," and the axes will appear (though they may be hard to see in the current style).
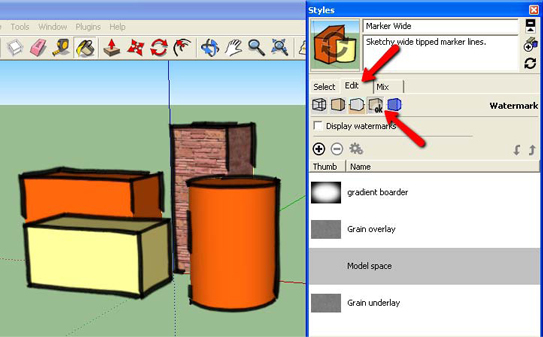
6. There seems to be a bug in removing a watermark from a style. I would think that dragging a non-watermarked style into "Watermark Settings" would do the trick, but it doesn't (at least not on my computer). So here's how to remove a watermark: Click the Edit tab, click the Watermark icon, and uncheck Display watermarks.
7. Finally, note that the thumbnail for the current style at the top of the Styles window has a double-arrow icon on it. This means that you've made changes to the style (still called the "Marker Wide" style) but you haven't saved these changes. Click this thumbnail, which removes the double arrows and updates the style. Don't panic - this doesn't update the original style in the "Sketchy Edges" folder, just the "In Model" style. You could change style's name if you want to avoid any confusion.
If you try this project with your children or students, and have some neat styles you'd like to share, please let me know! I will be happy to blog about it, and maybe feature your models in a future newsletter. Contact me at bonnie@3dvinci.net. Thanks!


- Sponsored Plugins

- Cover Story
-
 SketchUp Can Help You Win Interior..
 -
Best Laptops for SketchUp
-
How to Resize Textures and Materials..
-
Discovering SketchUp 2020
-
Line Rendering with SketchUp and VRay
-
Pushing The Boundary with architectural
-
Trimble Visiting Professionals Program
-
Diagonal Tile Planning in SketchUp
-
Highlights of some amazing 3D Printed
-
Review of a new SketchUp Guide
- Sketchup Resources
-
SKP for iphone/ipad
-
SKP for terrain modeling
-
Pool Water In Vray Sketchup
-
Rendering Optimization In Vray Sketchup
-
Background Modification In sketchup
-
Grass Making with sketchup fur plugin
-
Landscape designing in Sketchup
-
Apply styles with sketchup
-
Bedroom Making with sketchup
-
Review of Rendering Software
-
Enhancing rendering for 3d modeling
-
The combination of sketchup
-
Exterior Night Scene rendering with vray