
Lighting With Vray SketchUp, Definitive Guide 3
Nomer Adona
This is a two part tutorial of my third tutorial series with Lighting with Vray Sketchup. This third lighting tutorial focuses with "Studio Lighting". For those of you who want to see my other tutorials please click HERE.
Introduction
In this tutorial we will see how to set up a simple studio scene; will look at how professional photographers set up their studio lighting; and finally how to simulate these lighting using Vray rectangular and omni lights.
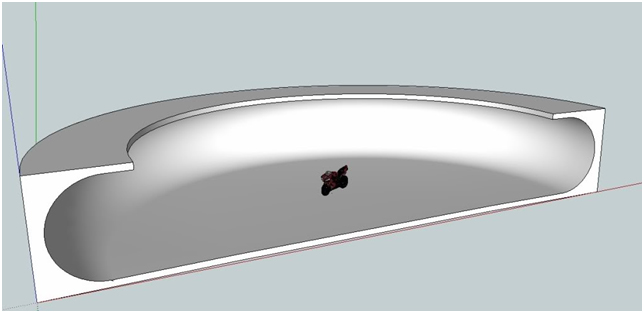
Step 1: Modeling the studio scene.
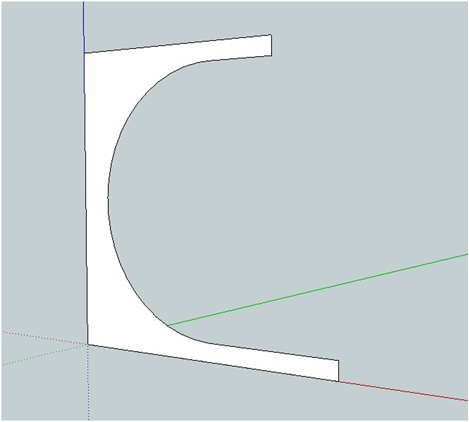
I will be using this profile for my studio background wall
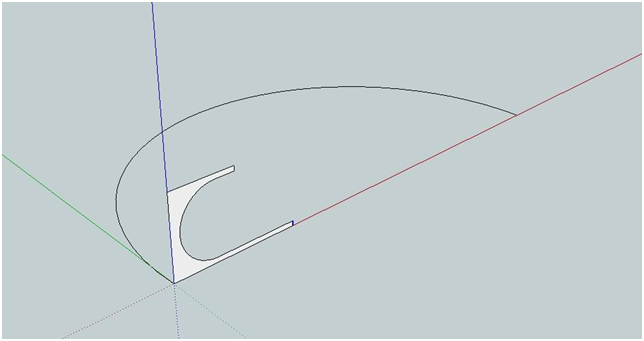
Next, I created an arc with 48 sides
I used the follow me tool to create this.
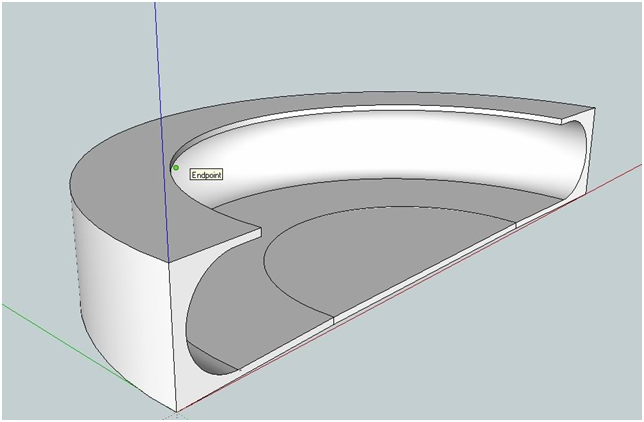
Follow me tool was used
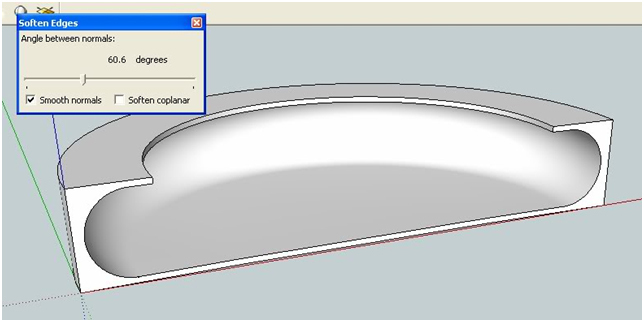
I used soften edges to smoothen the whole thing.
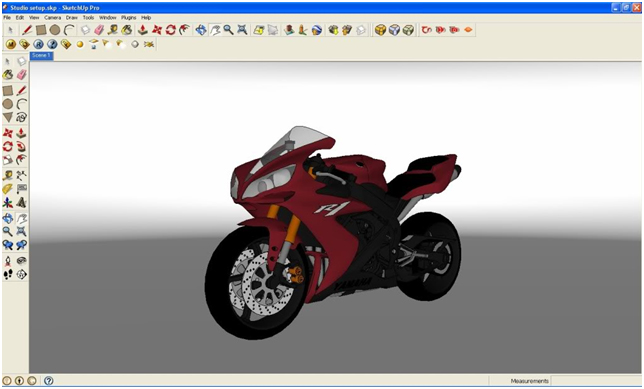
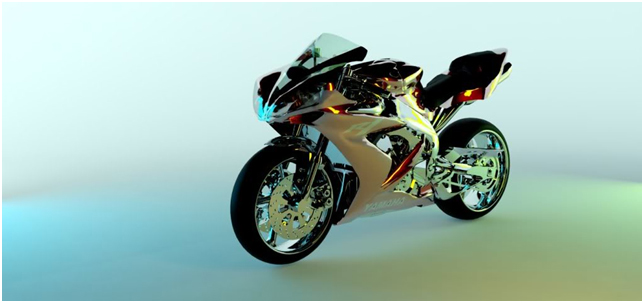
I imported a low resolution model from the 3D Warehouse and placed it in the middle of the scene. The model was further smoothed using "smooth and subdivide script". Download this Motorbike HERE
Main subject imported and placed in the middle
Here is the close up camera view.
Step 2: Studio Lighting
One of the subject I teach in the school is Digital Photography class. In our school we love to play studio lighting. For those of you who want to know more, how professional photographer set-up their studio lighting, here is my number one resource SITE for studio set up. Through this site, I have learned so much about studio lighting.
In this site, they explain clearly about different equipments like soft boxes, nbarn light, diffusers etc. They also focus on the theory of light in general. So if you are an avid photographer, this is a must site to visit.
Light Theory
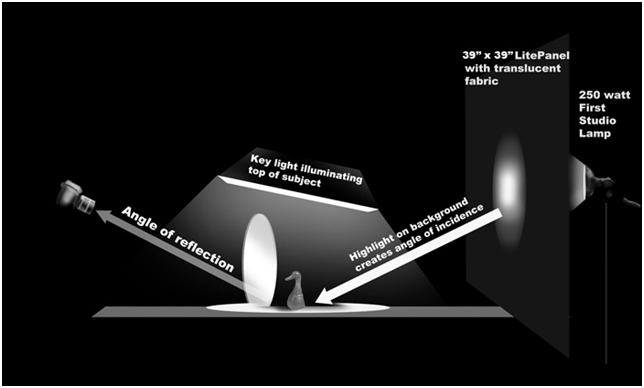
There are different ways to set up studio lights. It depends of what mood and what type of lighting you want to accomplish; ghetto, high key, low key etc. In this particular tutorial, I will be focusing on common "high key lighting set-up.
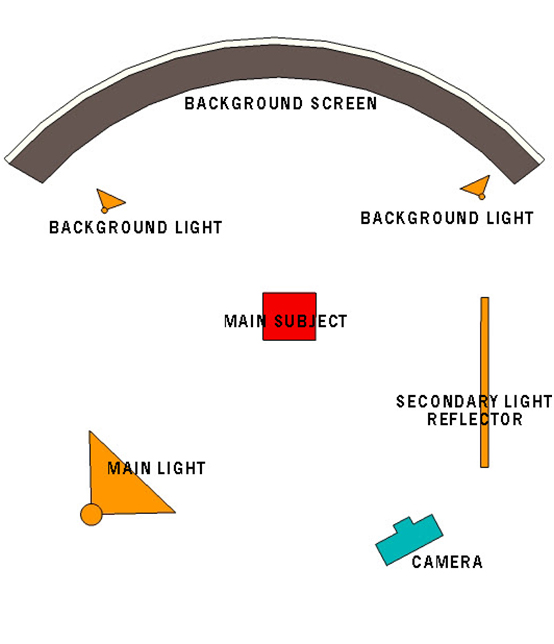
The image above represents the common high key lighting set-up. The subject is in the middle; two background lights shooting on the white background; the main soft box light in front; and the secondary light reflector on the right.
Of course there are different ways to set up studio lighting, but this thing wont be covered in this tutorial.
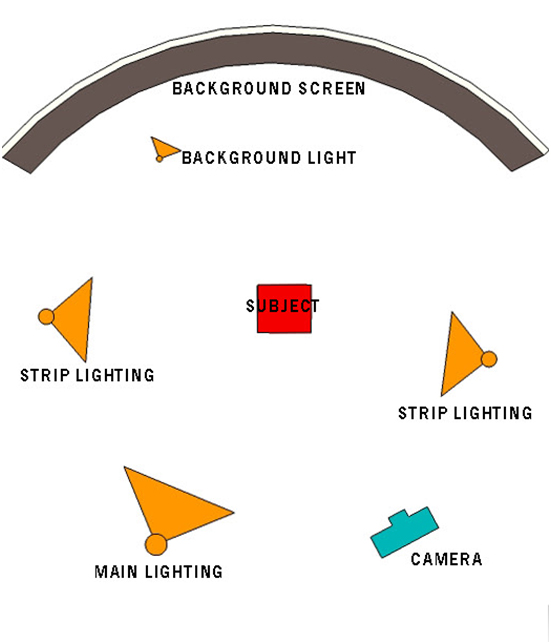
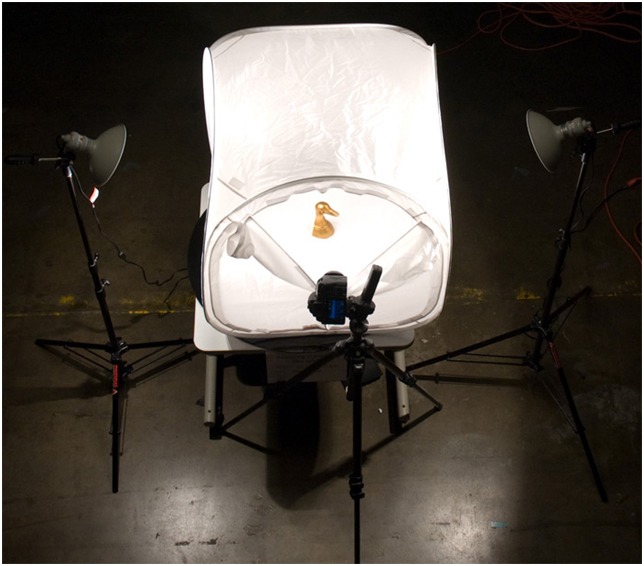
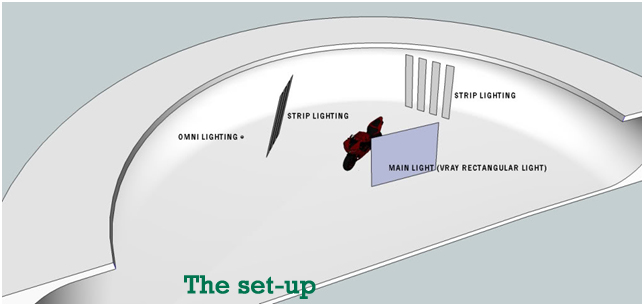
The above layout represents the kind of lighting I want to do in this tutorial while the image below represents these lighting elements with VRAY Lights.
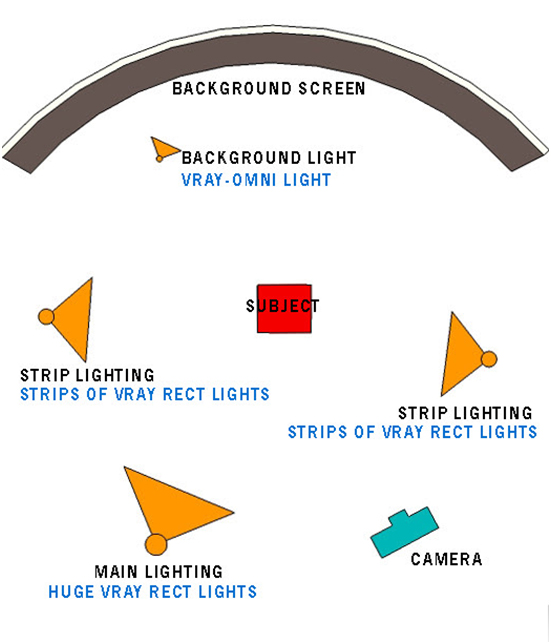
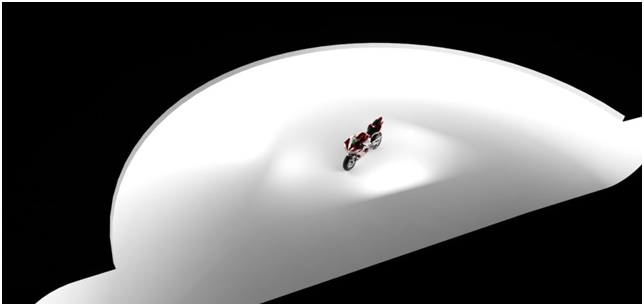
The image below shows the 3D studio set-up. The main light is a huge Vray rectangular light. The strip lighting on the right are four different vray rectangular lights (invisible), while the strip light to the left is a single Vray rectangular light (remodeled). Finally the Omni lighting (affect specular, shadow were untick) serves as background lighting.
Note: The bigger the area of the Vray rectangular light the softer the shadow.
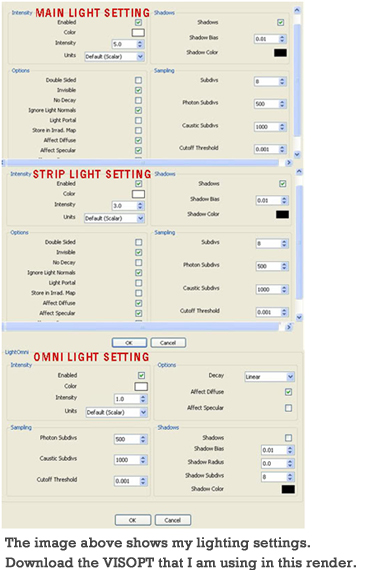
Step 3: Vray Light Settings
Next is we need to set the parameters of our lighting. I put the main light multiplier @5, secondary strip lights@3 and background omni light @1.
Here are the render images. Below shows a birds eye view on the effects of lighting to the main model.
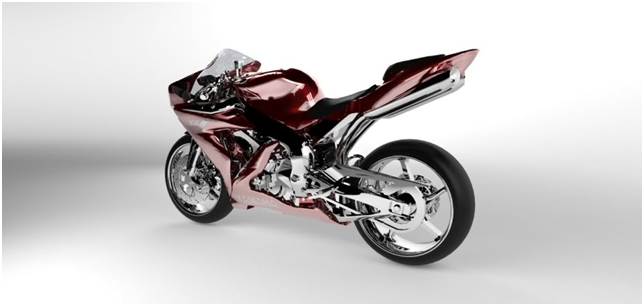
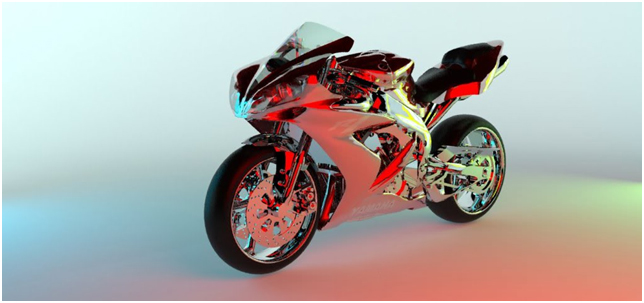
Here is a render with my normal camera view set-up. In the render below the specular effect of strip lighting is very obvious.
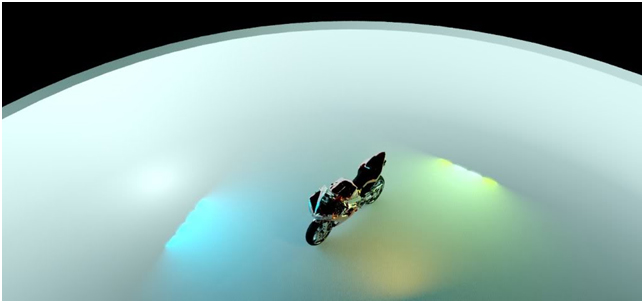
To extend exploring this tutorial, we can also experiment by changing the light colors just light gels that they put in a typical photographic studio lighting.
I hope this tutorial is useful


- Sponsored Plugins

- Cover Story
-
 SketchUp Can Help You Win Interior..
 -
Best Laptops for SketchUp
-
How to Resize Textures and Materials..
-
Discovering SketchUp 2020
-
Line Rendering with SketchUp and VRay
-
Pushing The Boundary with architectural
-
Trimble Visiting Professionals Program
-
Diagonal Tile Planning in SketchUp
-
Highlights of some amazing 3D Printed
-
Review of a new SketchUp Guide
- Sketchup Resources
-
SKP for iphone/ipad
-
SKP for terrain modeling
-
Pool Water In Vray Sketchup
-
Rendering Optimization In Vray Sketchup
-
Background Modification In sketchup
-
Grass Making with sketchup fur plugin
-
Landscape designing in Sketchup
-
Apply styles with sketchup
-
Bedroom Making with sketchup
-
Review of Rendering Software
-
Enhancing rendering for 3d modeling
-
The combination of sketchup
-
Exterior Night Scene rendering with vray