
Author : Jean-Luc Clauss
Combining SketchUp styles in LayOut
> Cover
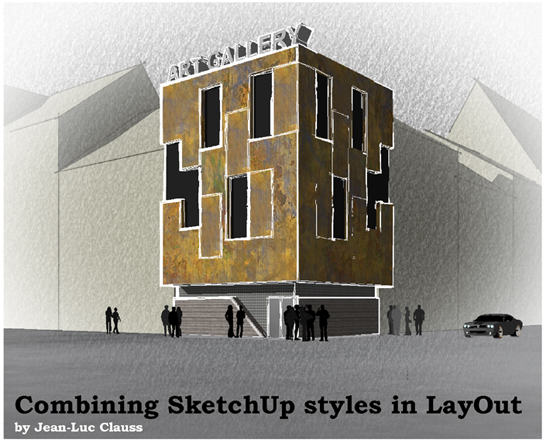
Combining SketchUp styles in LayOut
In SketchUp the Styles Dialog Box is one of the most interesting feature. Did you ever dream to apply different styles to your model ? This tutorial will show you how to combine multiple style effects to enhance your SketchUp rendering.
Step 1
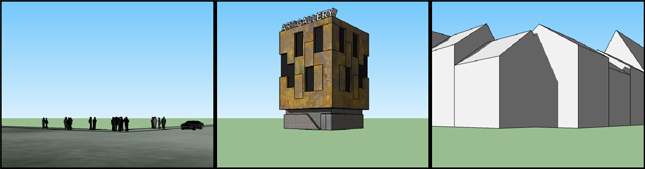
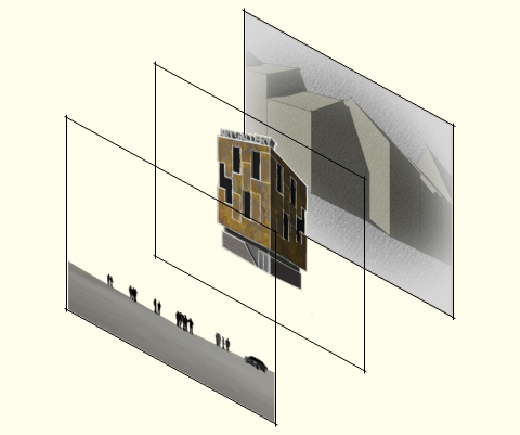
In SketchUp, divide your model into3 grounds.
> CAPTURE 01
Step 2
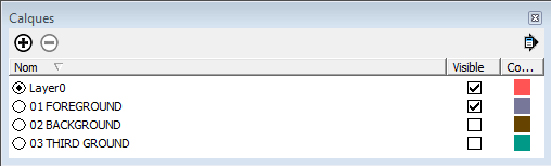
In the Layers Dialog box create 3 layers and be sure to assign each ground to a corresponding layer as in our example :
Road+people+car on the Layer named : 01 FOREGROUND
Art Gallery building on the Layer named : 02 BACKGROUND
Urban background on the Layer named : 03 THIRD GROUND
> CAPTURE 02
Step 3
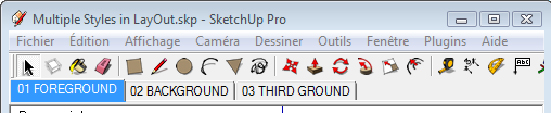
Create 3 scenes of your model and be sure they have the same camera settings. Name each scene according to the layers names.
> CAPTURE 03
Step 4
In each scene enable only the visibility of the layer corresponding on the scene. Apply the style of your choice in the different scenes. But be aware : for the FOREGROUND and the BACKGROUND, use styles with plain colored background and without watermark. Don't forget to update the properties of the scenes.
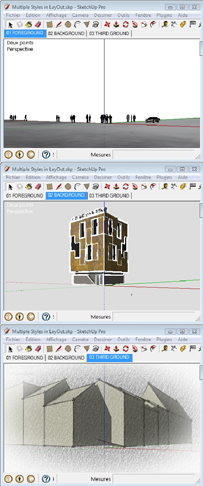
> CAPTURE 04
Step 5
Save your sketchup file and open LayOut. Click on your SketchUp file and drag it into the LayOut window.
Step 6
Resize the SketchUp window that you inserted as needed and place it in the center of your document.
Step 7
In the LayOut Layers box create 3 different layers using the same names as the SketchUp layers. Be sure the order of your layers respect the order of the grounds.

>CAPTURE 05
Step 8
Create 2 superimposed copies of your SketchUp inserted window. You have now 3 windows. In the first place, assign each window to a different layer.
>CAPTURE 06
In the second place, through the context menu, assign a different scene to each window. In our example, we will have this :
scene 01 FOREGROUND for the window inserted on layer 01 FOREGROUND
scene 02 BACKGROUND for the window inserted on layer 02 BACKGROUND
scene 03 THIRD GROUND for the window inserted on layer 03 THIRD GROUND
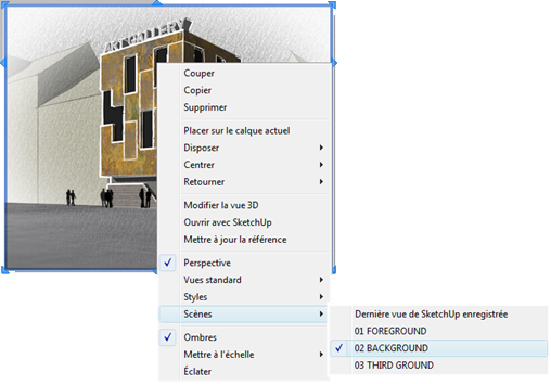
>CAPTURE 07
Step 10
Select the window representing the FOREGROUND and the BACKGROUND. In the SketchUp Model dialog box, disable the Background. According to what we said on step 3, it is only possible to disable plain colored backgrounds of non-watermarked styles.
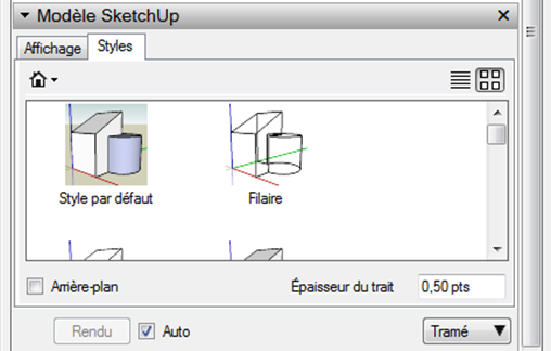
>CAPTURE 08
The result will be this :
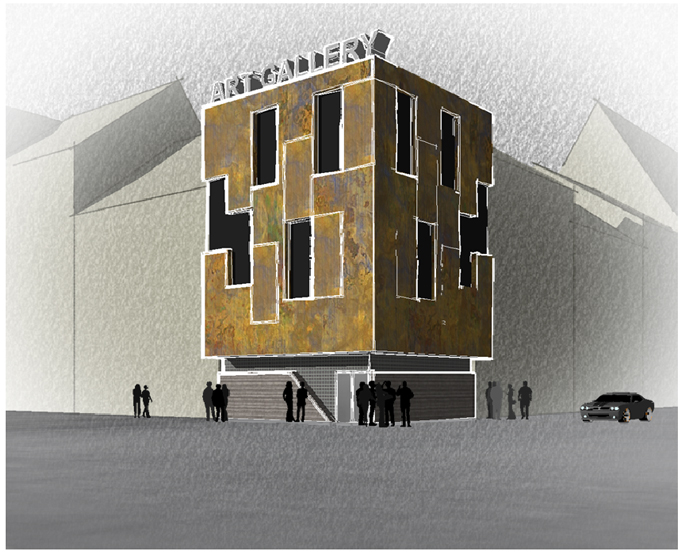
>CAPTURE 09

- Sponsored Plugins


- Sponsored Plugins

- Cover Story
-
 SketchUp Can Help You Win Interior..
 -
Best Laptops for SketchUp
-
How to Resize Textures and Materials..
-
Discovering SketchUp 2020
-
Line Rendering with SketchUp and VRay
-
Pushing The Boundary with architectural
-
Trimble Visiting Professionals Program
-
Diagonal Tile Planning in SketchUp
-
Highlights of some amazing 3D Printed
-
Review of a new SketchUp Guide
- Sketchup Resources
-
SKP for iphone/ipad
-
SKP for terrain modeling
-
Pool Water In Vray Sketchup
-
Rendering Optimization In Vray Sketchup
-
Background Modification In sketchup
-
Grass Making with sketchup fur plugin
-
Landscape designing in Sketchup
-
Apply styles with sketchup
-
Bedroom Making with sketchup
-
Review of Rendering Software
-
Enhancing rendering for 3d modeling
-
The combination of sketchup
-
Exterior Night Scene rendering with vray