
Author : Jim Martin
Build 3D models for free with SketchUp
SketchUp was a Google product until recently; it's now part of Trimble. Google's ownership, plus a free-to-use version of the application has made it popular with millions of people and, fortunately, there's still a free version.
Although very powerful, SketchUp is easy to use - once you know how, of course. You can use it for various things, including creating 3D models of houses, furniture or just about anything - even 2D floorplans.
We can only scratch the surface of SketchUp's capabilities here, but armed with the basic knowledge of how to use the main tools, you'll be able to quickly draw objects to scale in real-world dimensions.
Although you can use SketchUp on a laptop (the system requirements aren't demanding) you really need a proper mouse with a clickable scroll wheel to be efficient, particularly for moving around your models. Otherwise, you'll be forever clicking on the zoom, pan and orbit tools to move and resize the model on screen.
One of the key things to learn about SketchUp is that you'll use the keyboard to draw a line or rectangle to a certain length or size. When you begin drawing a line in a certain direction, simply type its length, for example '0.62m' and press Enter. You could alternatively type 0.62 if you've picked a template with units set to metres. However, you can type '62cm' or '620mm' to achieve a line of the same length.
If you follow our tutorial here, you'll end up with a basic model of a house. You can add textures using the Paint Bucket tool, then choose from the selection of materials, such as bricks or roofing. If you plan to use textures, make sure you draw your model to actual size otherwise bricks, for example will appear too large or too small.
To get started, download and install SketchUp from www.sketchup.com. Click the Download SketchUp button, then the Download SketchUp link. Avoid the SketchUp Pro button, which is an eight-hour trial.
How to create a 3D model with SketchUp
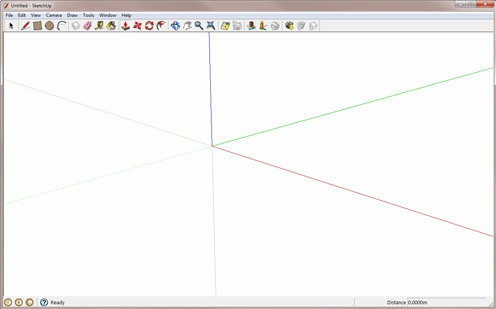
Launch SketchUp and click the Choose Template button on the welcome screen. Choose 'Architectural Design - Millimeters' and click Start using SketchUp. The main application will load with a 3D view.
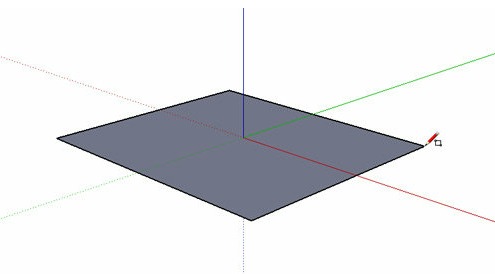
Click Camera > Standard Views > Iso, then click the Rectangle tool (third from left) and click, move your mouse to draw the rectangle, then click again to finish. Most tools in SketchUp work this way - there's minimal click-and-drag.
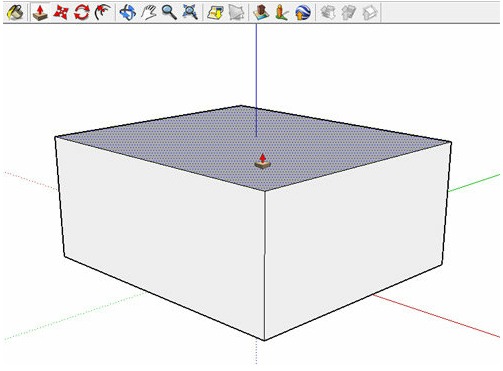
Select the Push/Pull tool (press P) and click inside your rectangle and move your mouse upwards to 'pull' the surface and make a 3D box. You can make objects a specific size by starting to draw, then typing in the number and pressing Enter.
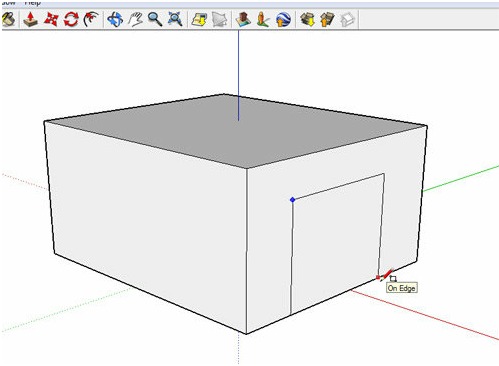
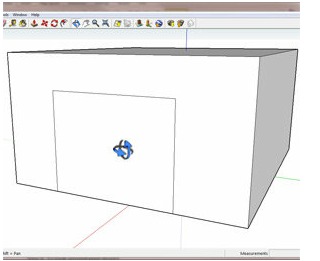
Using the rectangle tool (R) again, draw another rectangle on one of the box's surfaces. SketchUp snaps to edges and endpoints, making it easy to line elements up. You can find the midpoint of a line by hovering the cursor near it.
. To look around your model, use the Orbit, Pan and Zoom tools. Instead of selecting them from the toolbar, click your mouse wheel and drag to orbit your model, roll the wheel to zoom in and out, and click the wheel while holding Shift, then drag to pan.
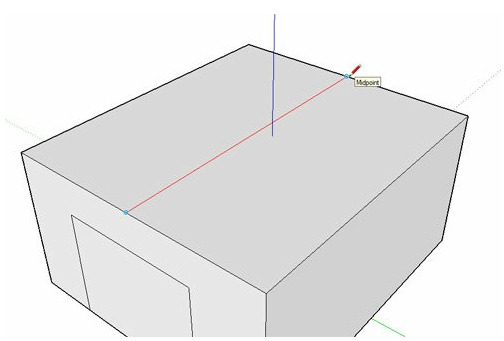
SketchUp will automatically snap to the three axes (red, blue or green) to help you draw accurately. Select the Line tool (P) and orbit the model to better see the top. Draw a line between two midpoints to divide it in half.
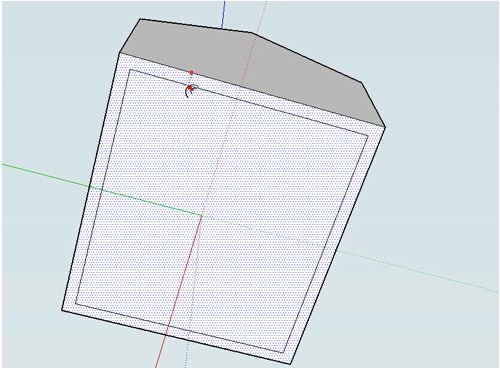
Highlight the line using the Select tool (Space) and use the Move tool (M) to create a roof. Make sure the line stays snapped to the blue axis to ensure the apex remains in the middle, and not skewed to one side.

The offset tool is one of the most useful. Orbit the model to look at it from below and use the Offset tool (F) to create an offset slightly in from the edges. With the Push/Pull tool (P), push the offset upwards to just below the roofline to create an overhang.
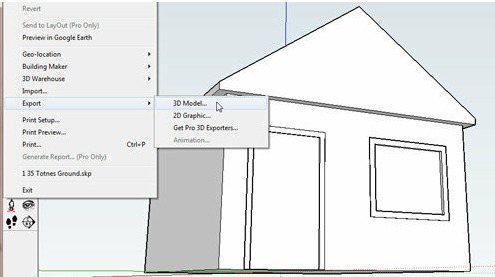
You can use the Pencil, Rectangle, Offset and Push/Pull tools to create windows and doors with ease. When you're finished, save your model. You can export it using the File > Export menu. Commonly, people export 3D models to Google Earth.

- Sponsored Plugins


- Sponsored Plugins

- Cover Story
-
 SketchUp Can Help You Win Interior..
 -
Best Laptops for SketchUp
-
How to Resize Textures and Materials..
-
Discovering SketchUp 2020
-
Line Rendering with SketchUp and VRay
-
Pushing The Boundary with architectural
-
Trimble Visiting Professionals Program
-
Diagonal Tile Planning in SketchUp
-
Highlights of some amazing 3D Printed
-
Review of a new SketchUp Guide
- Sketchup Resources
-
SKP for iphone/ipad
-
SKP for terrain modeling
-
Pool Water In Vray Sketchup
-
Rendering Optimization In Vray Sketchup
-
Background Modification In sketchup
-
Grass Making with sketchup fur plugin
-
Landscape designing in Sketchup
-
Apply styles with sketchup
-
Bedroom Making with sketchup
-
Review of Rendering Software
-
Enhancing rendering for 3d modeling
-
The combination of sketchup
-
Exterior Night Scene rendering with vray