
Author : Jim Leggitt
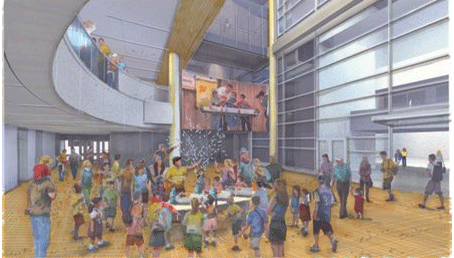
SketchUp Digital Watercolor - Science Atrium
I’m fascinated with new design visualization techniques and have created a new method of altering a Google SketchUp model scene by transforming it into what appears to be a watercolor painting! I call this process “digital watercolor” and it is quite easy for you to create with three basic software programs; 1) Google SketchUp, 2) Shaderlight, and 3) Adobe Photoshop.
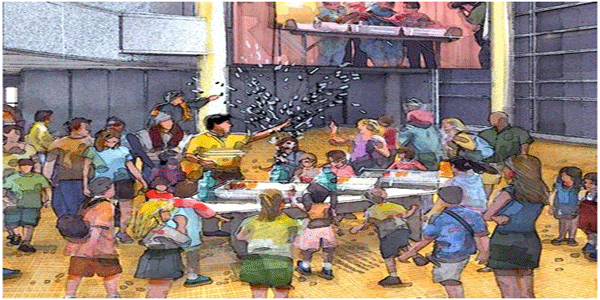
This project was for a museum addition in which I was asked to visualize an atrium space devoted to science education. My challenge was to illustrate a large gathering of museum visitors during a science demonstration. My step-by-step process is outlined below.

Step 1 - SketchUp Model. The museum architect generated the base Google SketchUp model and I composed the interior perspective adding people, furniture and a large projected image on an overhead screen.
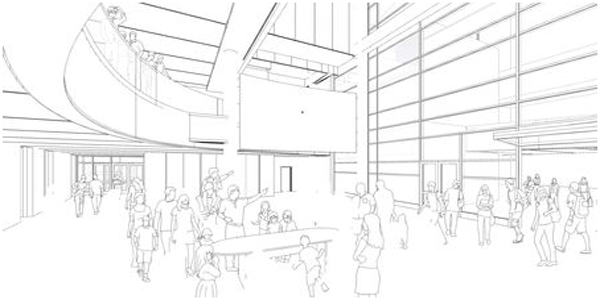
Step 2 - Exported SketchUp Edges. I saved a jpeg of only the SketchUp linework (edges) at a high resolution. The image would eventually be added as a layer to the photorealistic rendering from step 3.

Step 3 - Shaderlight Rendering. Using the SketchUp plugin software namedShaderlight, I placed lighting elements into the SketchUp model and rendered the scene. The photorealistic characteristics of Shaderlight generated the overhead spot lighting effects and indirect illumination of the space. I placed extra spotlights above the table in order to highlight the teacher and his work surface.
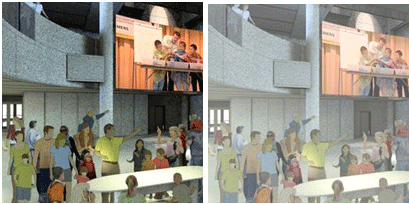
Step 4 - Composite Image. The linework exported from SketchUp and the Shaderlight rendering was combined in Adobe Photoshop in order to add the detail (ceiling, wall and window patterns) into the scene. I lightened the composited image in Photoshop and printed the overall scene onto 11”x17” heavy weight matte finish Epson paper using a large format ink jet printer.
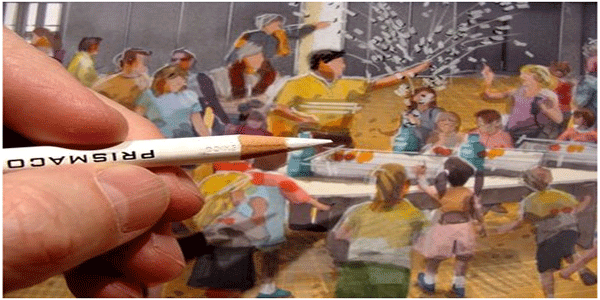
Step 5 - Hand Coloring. Using Chartpak AD markers and Prismacolor pencils, I added color to the people, walls, flooring and background. Notice that I drew objects on the table surface to resemble a science experiment. I added hightlights to the scene with a white Prismacolor pencil.
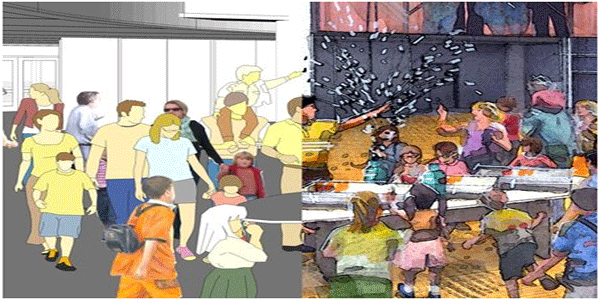
Step 6 - Color Drawing Scan. The completed color drawing (marker and pencils) looked quite dull with minimal contrast. This was normal for the process as I would eventually add contrast back to the image at the last filtering step. I scanned the colored print at 300 dpi and imported it into Adobe Photoshop.

Step 7 - Digital Watercolor. I applied the watercolor effect to the image using the watercolor filter in Adobe Photoshop. I finally adjusted the contrast levels to increase the blacks and whites in the image. I saved the 300 dpi file and eventually emailed the completed digital watercolor to the very pleased museum client!
Cross Posted from Jim Leggitt’s Blog

- Sponsored Plugins


- Sponsored Plugins

- Cover Story
-
 SketchUp Can Help You Win Interior..
 -
Best Laptops for SketchUp
-
How to Resize Textures and Materials..
-
Discovering SketchUp 2020
-
Line Rendering with SketchUp and VRay
-
Pushing The Boundary with architectural
-
Trimble Visiting Professionals Program
-
Diagonal Tile Planning in SketchUp
-
Highlights of some amazing 3D Printed
-
Review of a new SketchUp Guide
- Sketchup Resources
-
SKP for iphone/ipad
-
SKP for terrain modeling
-
Pool Water In Vray Sketchup
-
Rendering Optimization In Vray Sketchup
-
Background Modification In sketchup
-
Grass Making with sketchup fur plugin
-
Landscape designing in Sketchup
-
Apply styles with sketchup
-
Bedroom Making with sketchup
-
Review of Rendering Software
-
Enhancing rendering for 3d modeling
-
The combination of sketchup
-
Exterior Night Scene rendering with vray